Friday, September 26, 2014

N8 Speaker Earpiece Problem Ways Solution

This article is for Nokia N8 Speaker Problem Solution. If your phone's
speaker a.k.a Earpiece stops working the one that is used for calling
and not Songs & Ringtones use the diagram below to solve this problem.
If you need Nokia N8 Ringer a.k.a IHF-Speaker problem ways and jumper
points read this post Nokia N8 Ringer Problem Ways Solution.

I have marked both earpiece jumper points in this diagram but before
making these jumpers make sure that a faulty speaker is not causing
this problem replace it with a new one if problem persists or the
Nokia N8 Earpiece prints are damaged move on and make the jumpers as
shown in this diagram. If you need help with dissembling your phone
check this post Nokia N8 How To Dissemble Guide with Diagrams.

Please Note that we will edit these solutions or add new ones if found
in this page at any time in the future. So feel free to come back any
time on this page to stay up to date.

If you have further Questions please don't hesitate to leave a comment.

Note: Every repairing solution posted here is tested by at least one
member of our team. Use the information available here at Your Own
Risk. We are not responsible if any harm comes to your device during
the repairing process.
Read More..

CREED V4 for Samsung Galaxy Y GT S5360

 Feautures found Over:-

  • most advanced touchwiz launcher (creeds home)
  • 13 seconds to bootup
  • performance hacks
  • display+sound hacks
  • 15 status bar toggles
  • swipe to remove notification
  • extended power menu
  • 7 lockLcd mod
  • various new settings. And Much More On....
Patches:-
 

->Galaxy
->Wall
->Lights
->Appear (3.5 Stock)
->Transformers
->Dance in Brown
->Simple Green


HOW TO FLAST THE ROM:-
 

[So Here am I with for the one You waiting For and Scrolling too.. Now Ill give u a perfect Way to Flash this Custom Rom... You would be Thinking this one Would be as Same as the one which Normally others are but not Like it Now.!! This One is Quite Different from Others.]

1.Copy the the CreedV4.zip files to your SD card. [Note:- Not In Any Folder]
  
2. Turn off your phone and boot to Recovery Mod by pressing these buttons: volume up+home+power button. In Recovery you cant use the touch Lcd ..Can Operate only the buttons.

Volume up: Navigating UP Volume down: Navigating Down Home: Enter Power: Back

3. Navigate through Volume Up and Down:- 
i. Factory Data Reset 
ii. Clear Cache Partition 

4. After data wipe move to install zip from SD Card, then choose Update from SD and navigate toCreed.zip andPress the Home Button 

5. Wait until the installation ends. 
6. The first boot can take a long time.


7. After Phone Gets Switched On.. complete the Formalities asked by the Phone. and Now you are with the one of the Latest and Fastest custom Rom For Samsung Galaxy Y which no one could ever Dream Of Too... 

Read More..

Thursday, September 25, 2014

Sony Ericsson Spiro w100i w100a Hardware Problem Repair Guides and Manual


SE Spiro w100i,w100a Power On and OFF problem
SE Spiro w100i,w100a Restart or auto shut off randomly problem
SE Spiro w100i,w100a LCD Screen Display problem
SE Spiro w100i,w100a LCD backlight LED problem
SE Spiro w100i,w100a Numeric keys, Navigation keys and Volume Keypad problem
SE Spiro w100i,w100a Microphone Problem
SE Spiro w100i,w100a Ear Speaker problem
SE Spiro w100i,w100a Buzzer Speaker problem
SE Spiro w100i,w100a Camera problem
SE Spiro w100i,w100a FM radio problem
SE Spiro w100i,wi00a Bluetooth problem
SE Spiro w100i,w100a Insert Sim card or Sim not detected problem
SE Spiro w100i,w100a Not Charging problem
SE Spiro w100i,w100a network Signal problem
SE Spiro w100i,w100a Handsfree problem

Download the Sony Ericsson Spiro W100i and W100a Service Manual
Download heardsolution.blogspot.com
Read More..

Wednesday, September 24, 2014

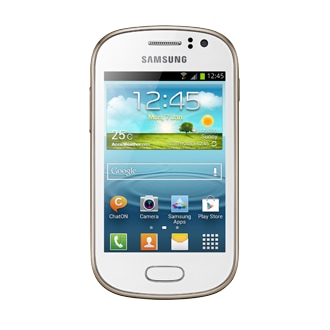
How to Update Samsung Galaxy Fame S6810 With Android 4 1 2 XXAMJ1 Jelly Bean Official Firmware Install Odin Guide


Samsung Galaxy Fame with model number GT-S6810 has already received the latest Android 4.1.2 Jelly Bean update with firmware build number S6810XXAMJ1. The new official firmware is currently available as an Over-The-Air (OTA) update as well as through Samsung KIES.
Firmware details
PDA: S6810XXAMJ1
CSC: S6810OLBANB1
MODEM: S6810DXAMG1
Version: Android 4.1.2
Build date: Oct 1, 2013
Regions: Indonesia, Vietnam
Samsung Galaxy Fame S6810 users who missed the OTA update notification or unable to access the update over Samsung KIES, can now download and install the same manually using our step-by-step guide.
Pre-requisites
1. Install USB Drivers for Samsung Galaxy Fame on the computer.
2. Enable USB Debugging Mode on the phone by navigating to Settings >> Developer Options.
3. Make a backup of all your important data before following the guide.
4. The Galaxy Fame should be factory unlocked and not locked to any particular carrier.
5. Ensure the battery of the phone is charged more than 80 percent.
6. The Android 4.1.2 XXAMJ1 Jelly Bean firmware is compatible only with Samsung Galaxy Fame (GT-S6810L). Applying this to any incorrect variant might brick the device. Verify the model number of the Galaxy Fame by navigating to Settings >> About Phone.

Files Required
1. Android 4.1.2 XXAMJ1 Jelly Bean Firmware for Galaxy Fame S6810
2. Odin 3.07
Related Article:How to Update Galaxy Fame S6810L with Android 4.1.2 UBANA1 Jelly Bean Official Firmware
Steps to Update Galaxy Fame S6810 with Android 4.1.2 XXAMJ1 Jelly Bean Firmware
Step 1: Extract Firmware zip file using WinRAR/7-Zip/WinZip or any other extracting tool, you will get a .tar.md5 file and some other files (optional).
Step 2: Extract Odin zip file and you will get Odin3 v3.07.exe along with few other files.
Step 3: Switch off the Galaxy Fame.
Step 4: Boot the device into Download Mode by pressing and holding Volume Down, Home and Power buttons together until a construction Android robot icon with a warning triangle appears on Lcd. Now press the Volume Up button to enter Download Mode.
Step 5: Run Odin on the computer as an Administrator.
Step 6: Connect the Galaxy Fame to the computer using USB cable while it is in the Download Mode. Wait until Odin detects the device. When the device is connected successfully, the ID: COM box will turn to light blue with the COM port number. Additionally, the successful connected will be indicated by a message saying Added.

Step 7: Select the following files in Odin from extracted S6810XXAMJ1 firmware folder:
  • Click the PDA button and select the .tar.md5 file.
  • Click the Phone button and select file with MODEM in its name. Ignore if there is no such file.
  • Click the CSC button and select file with CSC in its name. Ignore if there is no such file.
  • Click the PIT button and select the .pit file. Ignore if there is no such file.
Step 8: In Odin, enable Auto Reboot and F. Reset Time checkboxes. Also, ensure the Re-Partition checkbox is chosen only if a .pit file was chosen in the previous step.
Step 9: Verify everything suggested in Step 7 and Step 8 is done correctly. Then hit the Start button to begin the installation process.
Step 10: Once the installation process completes, your phone will restart and soon you will see a PASS message with green background in the left-most box at the very top of the Odin. You can now unplug the USB cable to disconnect it from the computer.

Samsung Galaxy Fame S6810 should be now updated with Android 4.1.2 XXAMJ1 Jelly Bean official firmware. Head over to Settings >> About Phone to verify the software version running on the device.

Note: If Galaxy Fame S6810 stuck at booting animation after Step 10 then go to recovery mode (press and hold the Volume Up, Home and Power buttons together) and perform Wipe data/Factory Reset and Wipe Cache Partition task before selecting reboot system now function. In recovery mode use Volume keys to navigate between options and Power key to select the option. Please note, performing wiping task will erase your device internal memory data and not external SD card data.

Read also: How to Root Galaxy Fame S6810 on Android 4.1.2 Jelly Bean Firmware
Read More..

Nokia 108 mic solution


Read More..

Download Android tablets phones USB Driver Pack Free Download


Download Android tablets & phones USB Driver Pack from here, here or here.

This pack contains:

- A1x_Livesuit_109_32bit_64bit
- Google_Android_ADB_USB_Driver_Rev7
- HTC_Driver_4.0.0.009 
- Huawei Ascend G300 u8815
- Infotm_ADB_32bit
- Infotm_ADB_64bit
- Infotm_OTG_Driver
- Infotm_USB_Driver
- LG_United_Mobile_Driver_3.8.1
- MaPan_USB_Driver_Win7
- preinstall
- Rockchip_X64-64bit
- Rockchip_X86-32bit
- Rockusb_v3.5
- Samsung_Usb_Driver_1.5.15.0
- USB Device (VID_1f3a_PID_efe8)
- WM8850_ADB_Drivers


Enjoy, share is love!
Read More..

Tuesday, September 23, 2014

Nokia C2 01 Insert Memory Card Solution

Nokia C2-01 mmc solution.
Read More..

Nokia 1202 0 9 menu keyped Not Working jumper solution tested 100 Me


1202ib
Read More..

Monday, September 22, 2014

how to root galaxy young GT S5360


actually what is the root??
Root is a user who has the ability to leverage and free to do whatever he wants to do on the android system
then what does it do??
Root serves to give the user full rights on the Android to be able to get into the Android system

Before we start it we think its no good because many want first ngeroot hp Android but before it pertimbangin first because when its in the root of the official guarantee that he will have lost his shortcomings

WARNING!!!
If it turns out there is damage or fail when / after rooting, Im not responsible, because I just ter-share. Previously suggested doing backups of important data beforehand ok

1. First download the files needed for rooting remember! Never in extracts
2. Copy update.zip to the microSD card should not be placed in the folder
3. Turn off your android smartphone
4. Press the power button, volume up and home button simultaneously to enter recovery mode
5. Select Apply update from sd card
6. Then select the file update.zip

7. Wait a moment, ....
if it says installed from sd cardcomplete means success rootingnya

8. Reboot and happy & successful (for the success) you are already in the Android status
Rooted.
9. To prove there is a new application with a skull icon named superuser.

WARNING!

Rooting is one of the best way if you want to explore on the Android system. With rooting, then you can access all the files and can install any application you want. But keep in mind, not all of the rooting process can proceed smoothly (which is caused by many things).

CONCLUSION!
Root Android the process is useful for open access to the Android system. Android gains root outline is to have complete control of Android. The complete control if not done carefully can cause damage to the system. So, if you still feel satisfied or fairly with Android capabilities and facilities owned, then the root process should not have done.
Read More..

Nokia 6700s slide keypad backlight LED solution

Nokia 6700 slide keypad backlight LED solution
Read More..

Sunday, September 21, 2014

Nokia 6120c Not Charging


Nokia 6120c Not Charging Solution,
if you check it much give few comments about this so that others can learn form your comments also.
If you have any other Questions please do not hesitate to share with me.

 
Read More..

Nokia C3 00 Battery connector ways


Read More..

How to unlock Samsung Gravity t456 Flight A796 Corby SGH t456

See this video 

Read More..

Saturday, September 20, 2014

Samsung Galaxy Note Manual GT N7000 factory data reset

Samsung
Samsung Galaxy Note Manual GT N7000 factory data reset

Performing factory data reset ( master reset or hard reset ) Samsung Galaxy Note Manual GT N7000 via Settings menu:


  1. select Applications from home Lcd
  2. select Setting
  3. select Privacy
  4. select Factory data reset
  5. select Erase everything ( master reset )
  6. select Done


Warning! All data will be erased from device memory, including system and application data, settings and downloaded applications. Back up your important data.  The device will restore to factory settings.

If your phone hangs or does not responding, Press and hold power key about 10 seconds.  It will rebooting automatically.  Or remove and re insert the battery and SIM Card.
Read More..

Samsung C5212 Speaker Ways Solution


Samsung C5212 Speacker Ways Solution,Samsung C5212 Speacker Ways damage Solution,Samsung C5212 Speacker Ways print damage Solution,Samsung C5212 Speacker Ways line problem Solution,Samsung C5212 Speacker Ways repair Solution,Samsung C5212 Speacker Ways 100% Tested Solution
Read More..

Friday, September 19, 2014

Nokia N70 Signal No Network for only

Read More..

Samsung i9003 Memory Card Solution

Samsung i9003 Memory Card Solution,Samsung i9003 Memory Card Not Supported Solution,Samsung i9003 Memory Card Inserted Solution,If You Face Lcd Light Problem Of Your Handset Now See Its Have This Solution How It Work Procedure Here,Samsung i9003 Memory Card Ways Solution,Samsung i9003 Memory Card Ways Jumper Solution,Samsung i9003 Memory Card Not Show Solution,Samsung i9003 Memory Card Ways Damage Solution,Samsung i9003 Memory Card Ways Repair Jumper Solution Guide Step By Step Procedure Here .If You Tested This Solution Plzz Share This Post & Visit Again Our Best Blogspot Felling Enjoy Of New Update Model Solution.
Read More..

Update Motorola Defy Plus with Android 4 0 4 Custom ICS Firmware Free Download

Motorola devices are awaiting the big update of Android 4.0 Ice Cream Sandwich and Motorola seems to delay the launch of these products. Whether official updates comes or not users can update with the custom ROM and the here comes one such in the form of Android 4.0.4 on your phone to the Motorola Defy smartphone.
Here in this article we will go through the procedure on how you can install the Android 4.0.4 on your Defy Plus smartphone. Let me mention you that this version of the firmware is not the officially released by Motorola and this is a custom developed ROM and to apply this update you need to have your devices rooted on the current firmware which you are on.

It has been continuous discussion on what works or not, let me tell you that this firmware just has the issues with the stock browser crashes while you switch between the tabs and remaining everything like camera, theme, multi boot works perfectly on your device.
Pre Upgrade Instructions
You should go through the following pre upgrade instructions –
Before we proceed with the steps to install the the custom Android ICS ROM follow the pre upgrade instructions here -

  • Make sure that this update is only for the users who own Motorola Defy Plus smartphone but not any other version.
  • Make sure that your smartphone is rooted.
  • Please make sure that you have more than 70 % battery life left on your phone.
  • Need to take a backup of various applications and files on your device, follow the below guide to back them individually –
    SMS – Use “SMS Backup & Restore app”,
    ContactsSync with the Gmail application,
    Call Log - Call Log and Restore
    Songs, Videos & Files – Copy to internal / External SD Card,
    APN and MMS Settings – Note down manually via “Applications > Settings > Wireless and Network > Mobile Networks > Access Point Names”.
  • Make sure that you need to have USB Debugging installed on your device. Go to Settings > Applications > Development > USB debugging” and you should tick the USB debugging option.
Disclaimer : Since this is a custom firmware, users should understand that they are proceeding with this update on their own risk. Neither developer nor we would be held responsible for anything happens to your device but we ensure that everything works fine.
Update Motorola Defy+ with ICS 4.0.4 Firmware Procedure
  • First you need to download the latest ICS for the Motorola Defy + and also the Google Apps package separately as well and both of them are separate files.
  • Once the download of the files are completed on your PC, you need to connect your phone using the USB cable to the PC and then place these two files on the root of your SD card.
  • Disconnect the USB connection and power off your smartphone, so that you can boot in the recovery mode.
  • One can easily enter Motorola Defy + smartphone in the recovery mode by using the various keys combination of Volume down, power button together at once. Release button when you see the recovery menu.
  • Up next you need to select “install zip from sd card” > “choose zip from sd card” and browse for the firmware package you have downloaded earlier. Here in the recovery mode you can make use of the volume up and down keys to navigate between the options and to select an highlighted option you need to press the power button.
  • Once that is applied you would be taken back to the recovery mode Lcd.
  • Now repeat the procedure of “install zip from sd card” > “choose zip from sd card” for the Google Apps package.
  • Now return back to the recovery menu Lcd and select “reboot system now” to reboot your device and see the phone with the firmware.
With that procedure you have updated your Motorola Defy + with the custom based Android 4.0.4 Ice Cream Sandwich firmware until the official arrives.
Source

What others Searched for:samsung defy,MOTOROLA DEFY,moto defy,motorola defy android,motorola defy plus,Motorola moto defy,motorola ace,motorola,motorolla defy.

Read More..

Thursday, September 18, 2014

Nokia X2 00 insert sim Sim ic jumper Ways fix problem

Nokia Mobile X2 with Insert Sim, Insert Sim Jumpers, Insert Sim Problem, Insert Sim How to Fix problem, Insert Sim Ways
nokia x2-00 insert sim jumper
nokia x2-00 no sim card
nokia x2-02 sim sokit jampr
x200
nokia x2 02 mobile not show memory card and no sim card problem solution
x2-00 sim ways
nokia x2 01 no sim card
X2 00 nokia sim not responding
x2 00 sim problem
x2-01 no sim card problem solution
nokia
Once you have dis assemble the mobile phone look at the whole board vary carefully. If here is some rust carbon or water damages apply electronics cleaner and make it clean.Apply hot air to make it dry
Read More..

Symphony c105 headphone solution new

Symphony c105 headphone solution new

Read More..

Nokia 5530 Charging No Response Problem Jumper Solution 100 Tested

Nokia 5530 Xpress music Charging no response.
Read More..

Wednesday, September 17, 2014

Nokia 105 Insert Sim fix problem

Nokia Mobile 105 Insert Sim How to Fix problem
Nokia Mobile 105 No Sim card How to Fix problem
Nokia Mobile 105 Sim Ways Jumper How to Fix problem
Nokia Mobile 105 Sim Ways Damage How to Fix problem
Read More..

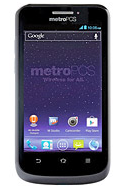
ZTE Avid 4G Tips and Tricks

It is very important if you know some tips on your device like ZTE Avid 4G. It will help you learn more about your device to make your life much easier in using it. Improving your productivity and fulfilling what you expected on your ZTE Avid 4G.

Here are some How Tos for your ZTE Avid 4G  These How Tos may still not yet complete and I am finding some time to work on the others:

How to Factory Reset (Hard Reset) ZTE Avid 4G

The factory reset option on any smartphone erases all data on your phone including your Google account, all system and app settings and even all your downloaded apps. This function will restore your phone to its factory settings like when you first open it from its box. It is recommended to backup your important files on your computer before attempting to reset your device. Heres how to factory reset your ZTE Avid 4G.

1. On your device touch on Home.

2. Go to Apps, then Settings.

3. Select on Backup and reset.

4. Choose Factory data reset.

5. Touch on Reset phone. If you also want to remove all data saved to an installed micro SD, just tick the Erase SD card check box before touching Reset phone.

6. And lastly touch on Erase everything and just follow the prompt to complete the factory reset.

Follow the onLcd instructions to set up your phone again after the reset.

If your device is unresponsive, then you may need to Hard Reset. Press and hold on the Powerbutton and Volume Up at the same time for a few seconds.


How to Extend Battery Life of ZTE Avid 4G

Battery Life depends on how you use your device. For ZTE Avid 4G device, if you want to save your battery to last longer hours, you may need to adjust your settings. Follow these suggestions:

• Lessen the Lcd brightness and the Lcd lock timeout.

• Turn down your device volume with the volume keys.

• Close any apps or features when you are done using it so they will not continuously running in the background.

• Turn off the network connection if you are out of range so that your device will stop searching for a network signal.

• You should use the latest version of the software update. Software updates improves some features and fixes some bugs on the previous software version.

• Turn off the camera flash.


How to Add, Move, Adjust, and Remove Shortcuts and Widgets on ZTE Avid 4G

Just like a desktop, it also works best on any smartphones to add a shortcut on a homeLcd. This somehow makes navigation, especially to important files/apps, more accessible. Its less hassle and less tapping. ZTE AVid 4G definitely allows you to make your device experience stress-free by adding a shortcut /widgets to important apps on your homeLcd. Heres how to do it.

To add shortcuts and widgets:

1. First touch the Home Key.

2. Then tap on

3. If you want to add a widget, touch WIDGETS.

4. And touch and hold a widget or an app and drag it to the homeLcd.


To move shortcuts or widgets:

1. On the homeLcd, touch and hold a widget or a shortcut.

2. Then drag it to the place you want.


To remove shortcuts or widgets:

1. First, touch and hold a widget or shortcut on the homeLcd.

2. Drag it toto remove it.


To adjust widget size:

1. First, touch and hold a widget on the home Lcd and then release it.

2. Then an outline appears around the widget. Drag the outline to resize the widget.


Take note that not all widgets can be resized.


How to Turn Wi-Fi On and Connect to a Wi-Fi Network on ZTE Avid 4G

Wi-Fi is a wireless connection that let you surf on the Internet without having a physical connection or a cable connected to your device. But before you can connect to the Internet, you will need to turn on the Wi-Fi on your device. Follow these steps:

1. Press the Home Key > Menu Key System settings > Wi-Fi.

2. Then slide the Wi-Fi switch to the ON position to turn on Wi-Fi.

You phone will automatically searches for Wi-Fi networks in range and displays their names and security settings. Your phone also connects to previously linked networks when they are in range.

3. Touch a network name to connect to it. If the network is secured, enter a password or other credentials.


Adding a Wi-Fi Network:

You can add a Wi-Fi network if it does not broadcast its name (SSID), or when it is not in range.

1. Press the Home Key > Menu Key > System settings Wi-Fi.

2. Then slide the Wi-Fi switch to the ON position.

Read More..

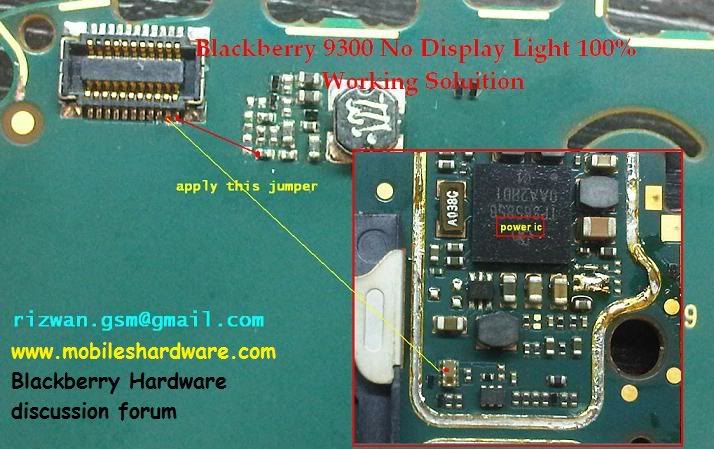
Blackberry 9300 No Display Light 100

Read More..

Tuesday, September 16, 2014

Samsung i9003 All Keypad Not Working Solution

Samsung i9003 All Keypad Not Working Solution,Samsung i9003 All Keypad Hang Not Working Solution,Samsung i9003 All Keypad Not Working Ways Solution,Samsung i9003 All Keypad Not Working Solution,Samsung i9003 All Keypad Not Working Keypad Ways Jumper Solution,Samsung i9003 All Keypad Not Working Which Parts To Remove This Again Working handset Solution,Samsung i9003 All Keypad Not Working Repair Solution,Samsung i9003 All Keypad Not Working Step By Step Procedure Here Solution.Tnxx To Visit My Blog Its You Tested Plz Share This Post .
Read More..

Sony Ericsson Xperia Active ST17i Factory Data Reset

Sony Ericsson Xperia Active ST17i Factory Data Reset - If you are an energetic individual that enjoys outside activities, youll contemplate getting this Sony Ericsson Xperia Active ST17i. Sure, this telephone is intended specially along with mud proof and waterproof therefore you don’t need to be compelled to worry relating to the actual gizmo whereas performing all of your activities. moreover, you can utilize the touchLcd even once your fingers are wet.

SonyEricssonXperiaActiveST17i_thumb

This smartphone is power-driven by Qualcomm MSM8255 flower one rate processor and 512 MB RAM. whereas to the package deal, it uses golem OS version 2. 3 (Android Gingerbread). it is 3” Lcd show equipped along with semiconductor diode backlit liquid crystal show electrical phenomenon touchLcd and Bravia Mobile Engine. The actual show is supported along with 320 x 480 pixels resolution ; measuring method sensor ; Proximity sensor ; scratch resistant show ; Timescape UI ; multi-touch input technique ; and bit sensitive controls. For recording and pic shot, a 5 MP camera along with Geo Tagging, Face detection, optical device and semiconductor diode flash is linked upon the rear panel. whereas front facing VGA camera conjointly obtainable for video occupation.

Here are a few choices you can understand throughout this telephone : Wi-Fi ; Bluetooth version 2. 1 along with A2DP and EDR ; microUSB version 2. 0 ; preloaded Google applications (Google Mail, GTalk, YouTube, Google Lookup, Google Maps and a lot of) ; one GB internal memory (320 MB consumer accessible) and expandable external memory as much as thirty 2 GB (2GB added) ; GPS along with A-GPS assistance ; games ; document viewer ; Adobe flash 10. 1 assistance and further.
Sony Ericsson Xperia Active ST17i Factory Data Reset

You can reset your phone to its original settings (Factory Setting), with or without deleting all of your personal data. It is possible to reset the phone to the state it was in before you first turned it on. But before you perform a reset, make sure to back up any important data saved on your phone.

To reset the phone:

  • From you Home Lcd, tap

  • Find and tap Settings > Privacy

  • Tap Factory data reset

  • To erase not only internal storage but also other user data such as pictures and music, mark the Erase SD card checkbox.

  • Tap Reset phone

  • To confirm, tap Erase everything
Read More..

Monday, September 15, 2014

Samsung E2510 Pa Jumper 100 tested solution


Read More..

Nokia 1200 white screen solution

Nokia 1200 may be white Lcd problem is many reason.Now I share What is the reason for this problem.

1.If Damage display
2.If broken rebon and display base
3. If broken display ways
4. If short display pin.


How to repair this problem : If your phone is effect this problem then first check display next check display rebon and display base after that check display ways.If they are ok but problem still then make this jumper following this picture.


Read More..

NOKIA 1202 1203 Display path


NOKIA 1202/1203 Display path
Read More..

Sunday, September 14, 2014

Walton C2 No Sim Card Problem Solution 100 Tested

Walton C2 Sim Ways Line Jumper Solution 100% Tested,Walton C2 Insert Sim Card Problem Solution ,Walton C2 Sim Ways Damage Solution,Walton C2 Sim Ways Line Broken Solution,Walton C2 Sim Ways Line Missing Jumper Solution 100% Tested .
Walton
Read More..

Motorola Moto G Tips and Tricks

Read More..

i phone 3G Mic Solution 100 tested

If you tried to replace dock flex with mic try this solution.
Read More..

Saturday, September 13, 2014

iphone3gs final charging solution tested 100

http://forum.gsmhosting.com/vbb/attachment.php?attachmentid=276767&d=1330953022
Read More..

China Nokia 6300 Flash File


Nokia 6300 Flash files Download,
if you check it much give few comments about this so that others can learn form your comments also.
If you have any other Questions please do not hesitate to share with me.
Read More..

Friday, September 12, 2014

Mic Solution Problem Ways

This article covers Nokia 111 and Nokia 110 Mic Problem Solution. If your phones microphone is not working consult the diagram below. This solution works on all Nokia 110 RM-827, Nokia 1100 RM-810, Nokia 111 RM-811 and Nokia 1110 RM-871.

I have marked Nokia 111 and Nokia 110 Mic Ways and Jumper points in this diagram but before you make these jumpers make sure that a faulty microphone is not causing this problem. Test it with an electronics meter or simply replace it with a new one.

Please Note that we will edit these solutions or add new ones if found in this page at any time in the future. So feel free to come back any time on this page to stay up to date.


If you have further Questions please dont hesitate to leave a comment.

Note: Every repairing solution posted here is tested by at least one member of our team. Use the information available here at Your Own Risk. We are not responsible if any harm comes to your device during the repairing process.
Read More..

Blackberry 8520 vusd jumper Solution

Blackberry 8520 vusd jumper solution ,blackberry vusd not working solution,vusd line damage solution,vusd jumper tested solution vusd 2.8 vol 100 jumper solution if u need 100% testde solution try this i hope solved your problem many time try this and many time tested solution see and jumper now 
Blackberry 8520 vusd jumper solution ,blackberry vusd not working solution,vusd line damage solution,vusd jumper tested solution vusd 2.8 vol 100 jumper solution if u need 100% testde solution try this i hope solved your problem many time try this and many time tested solution see and jumper now
Read More..

How to Add a Shortcut on Sony Xperia Z1s Homescreen

Just like a desktop, it also works best on any smartphones to add a shortcut on a homeLcd. Heres how to do it:

1. On your devices homeLcd, touch and hold and empty area until the device vibrates.
2. After doing so, tap on .
3. Then go to Shortcuts and select a shortcut.
4. Or another option, just go directly to the Application Lcd and touch and hold the application.
Read More..

Thursday, September 11, 2014

How to Root and Instal CWM Recovery on HTC One XL AT T HTC One X

HTC One XL is basically AT & T HTC X, today we shall guide you on how to install CWM on HTC X AT & T or HTC One XL. There is also the Super SU available for HTC One XL / AT & T HTC X, ROM manager is also great to use on this smartphone and today local is very important for the HTC One XL users as its very hard to find something about the HTC One XL. It took me 4 days to find Super SU and CWM recovery for HTC One XL.
In following article we shall guide you step by step how to install CWM recovery on your HTC One XL / HTC X AT & T. before we started the make sure the battery of your smartphone is more than 80% charged, and you backup your call and message data.


Note :

  • Your HTC One XL/HTC One X AT&T must be running android 4.1.2 jelly bean .
  • Enable USB Debugging Mode by go to Settings>Developers Options >Check USB Debugging Mode.
  • This guide is only for HTC One XL.

How To Root and Install CWM Recovery on HTC One XL/AT&T HTC One X.

  1. First of all unlock bootloader of your smartphone 
  2. Make sure Fastboot/ADB ic installed on your PC.
  3. Download Super SU and CWM for HTC One XL.
  4. Now copy CWM Recovery image to fastboot folder and rename it Recovery. 
  5. Turn off your smartphone and then press and hold Volume Down+Power button , when the soft keys blink 6 times release the power button , keep holding volume down button.
  6. Connect your smartphone with PC.
  7. Open fastboot folder and then hold Shift Key and press Right click , command prompt will open.
  8. Type the following command in command prompt :fastboot flash recovery recovery.img
  9. After the process is done , select Reboot Bootloader. 
  10. Now select Recovery from Bootloader.
  11. When Recovery is open select following.
  12. Now select ‘Install zip from sd card’, then select ‘choose zip from sd card’.
  13. Select the Super SU.zip file and confirm installation.
  14. After that Go back and reboot smartphone .
  15. After reboot open App Drawer to check for Super SU App to verify Root Access.
Read More..

C3222 Restart how to fix problem

Samsung C3222 Restart Problem Repairing Solutions are available in the
following article. Samsung C3222 Auto On Off repairing information can
also be found in the diagrams further in this post.

In Samsung C3222 Restart Problem or Auto On Off Problem can occur
because of a certain part on the mobile phone's motherboard. I have
marked this part in the Diagram below but before doing any hardware
solutions you should clean Samsung C3222 Motherboard completely to
make sure that rust or carbon is not causing this problem.

Please Note that we will edit these solutions or add new ones if found
in this page at any time in the future. So feel free to come back any
time on this page to stay up to date.

If you have further Questions please don't hesitate to leave a comment.

Note: Every repairing solution posted here is tested by at least one
member of our team. Use the information available here at Your Own
Risk. We are not responsible if any harm comes to your device during
the repairing process.
Read More..