Samsung has released the Android 4.2.2 Jelly Bean update with firmware build number S7270XXUAMH1 for the Galaxy Ace 3 with model number GT-S7270. The new official firmware is currently available as an Over-The-Air (OTA) update as well as through Samsung KIES.
Samsung Galaxy Ace 3 S7270/S7272 users who have already installed their devices with Android 4.2.2 Jelly Bean, may root their devices using the tutorial below.
Disclaimer: Rooting voids the warranty of your device. We and the developer of this rooting procedures shall not be held responsible if any undesirable outcomes may happen to your device. use of this root guide is solely at your own risk!
Pre-Requisites
1. Install USB Drivers for Samsung Galaxy Ace 3 on your computer.
2. Enable USB Debugging Mode on the device by navigating to Settings >> Developer Options.
3. Make a backup of all your important data before following the guide.
4. The Galaxy Ace 3 should be factory unlocked and not locked to any particular carrier.
5. Ensure the battery of the device is charged more than 80 percent.
6. The ClockworkMod Recovery (CWM) files works only on the Samsung Galaxy Ace 3 with model number GT-S7270 and GT-S7272 (Dual SIM). Applying these on any incorrect variant might brick the device. Verify the model number of the Galaxy Ace 3 by selecting Settings >> About Phone.
Files Required
1. CWM (Mirror Link) or CWM Touch (Mirror Link)
2. SuperSU (UPDATE-SuperSU-v1.51.zip) or the latest version
3. Odin 3.07 (Mirror Link)
Steps to Install CWM Recovery on Samsung Galaxy Ace 3
Step 1: Extract the Odin 3.07 file using WinRAR/7-Zip/WinZip or any other extracting tool.
Step 2: Copy the SuperSU file to the SD card of your phone.
Step 3: Switch off the Galaxy Ace 3. Then boot the device into Download Mode by pressing and holding Volume Down, Home and Power buttons together until a construction Android robot icon with a warning triangle appears on screen. Now press the Volume Up button to enter Download Mode.
Step 4: Run Odin on the computer as an Administrator.
Step 5: Connect the Galaxy Ace 3 to the computer using USB cable while it is in the Download Mode. Wait until Odin detects the device. When the device is connected successfully, the ID: COM box will turn to light blue with the COM port number. Additionally, the successful connected will be indicated by a message saying Added.
Note: If the Added message does not appear, then try re-install USB drivers or changing the port on the computer.
Step 6: In Odin, click the PDA button and select the CWM Recovery .tar file. Verify that Auto Reboot and F. Reset Time checkboxes are selected. Also, ensure the Re-Partition option is NOT selected.
Step 7: Double-check and click Start button in Odin. The installation process will now begin.
Step 8: Once the installation process is completed, your phone will restart and soon you will see a PASS message with green background in the left-most box at the very top of the Odin. You can now unplug the USB cable to disconnect it from the computer.
Steps to Root Galaxy Ace 3 by Installing SuperSU via CWM Recovery
Step 9: Reboot the device into CWM Recovery by pressing and holding Volume Up, Home and Power buttons together.
Step 10: In CWM Recovery, select "install zip from sdcard" and then select "choose zip from sdcard". Now, navigate to the SuperSU file that you copied earlier and confirm the installation by selecting Yes.
Step 11: Once installation process is completed, return to main recovery menu and select "reboot system now".
Samsung Galaxy Ace 3 S7270/7270 running on Android 4.2.2 Jelly Bean is now rooted successfully. You can now install any app that requires root permission. Verify the root status of the device by downloading Root Checker app from Google Play Store.
Thanks to all fellas at XDA who first tried out this rooting technique. This root method was originally posted via XDA-Developers original thread.
Showing posts with label on. Show all posts
Tuesday, November 18, 2014
Nokia 2630 ON OFF power button switch jumper ways
Heres the jumper ways solution for nokia 2630 ON and OFF switch if the handset device showed charging indication when the battery charger is plug-in but unable to power up when the power button is being pressed.
If the keypad flex is working okay and already tried a new replacement but still it wont power up when the power key is pressed.
The solution below showed the alternative spot where to apply a jumper wire when the power key line paths is cut .
If the keypad flex is working okay and already tried a new replacement but still it wont power up when the power key is pressed.
The solution below showed the alternative spot where to apply a jumper wire when the power key line paths is cut .
Nokia 2630 power ON OFF jumper ways tracks
Friday, November 7, 2014
Nokia Asha 200 Power Button On Off Switch Not Working Problem
if you have a Nokia Asha 200 dead they may can have a power switch on off problem so please in first step plug in a charger and if Nokia Asha 200 is charging proper and well but not getting on it means the main problem can be power switch on off fault.
![Nokia]()
so for this you have to change power switch button on off button in Nokia Asha 200 if prints are also damge in Nokia Asha 200 for on off button then here is a full path and track for power switch button in diagram that is attached with this post so check all this path and track for power switch on off button in Nokia Asha 200 and if any of these links broken than make these jumpers as shown in diagram with red line while blue color is indicated for ground print.
Monday, November 3, 2014
Run Mobile Application On PC Jar and Jad
Here you will find an intresting software to run your favourite mobile apps on computer.
Lets Start, Follow the below steps:
- First Download KEmulator Lite Click me to Download... (Select java emulator for windows)
- Exctract The Zip File and Open KEmulator.exe
- Click On Midlet
- Click Load Jar And Select Your Application.
- Now you can run your favorate mobile app on pc
- Thats It!
Saturday, October 18, 2014
Nokia Asha 311 Power Button On Off Switch Not Working Problem
if you have a Nokia Asha 311 dead they may can have a power switch on off problem so please in first step plug in a charger and if Nokia Asha 311 is charging proper and well but not getting on it means the main problem can be power switch on off fault.Nokia Asha 311 WiFi Not working Problem Solution Ways see All cellular mobile repair solution

so for this you have to change power switch button on off button in Nokia Asha 311 if prints are also damge in Nokia Asha 311 for on off button then here is a full path and track for power switch button in diagram that is attached with this post so check all this path and track for power switch on off button in Nokia Asha 311 and if any of these links broken than make these jumpers as shown in diagram with red line while blue color is indicated for ground print.
for more detail and new tips and tricks about this problem keep visiting this page we will update it timely with new diagrams.some related post are also given bellow you can read them also for more information.

so for this you have to change power switch button on off button in Nokia Asha 311 if prints are also damge in Nokia Asha 311 for on off button then here is a full path and track for power switch button in diagram that is attached with this post so check all this path and track for power switch on off button in Nokia Asha 311 and if any of these links broken than make these jumpers as shown in diagram with red line while blue color is indicated for ground print.
for more detail and new tips and tricks about this problem keep visiting this page we will update it timely with new diagrams.some related post are also given bellow you can read them also for more information.
Friday, September 12, 2014
How to Add a Shortcut on Sony Xperia Z1s Homescreen
Just like a desktop, it also works best on any smartphones to add a shortcut on a homeLcd. Heres how to do it:
1. On your devices homeLcd, touch and hold and empty area until the device vibrates.
2. After doing so, tap on
.
3. Then go to Shortcuts and select a shortcut.
4. Or another option, just go directly to the Application Lcd and touch and hold the application.
Read More..
1. On your devices homeLcd, touch and hold and empty area until the device vibrates.
2. After doing so, tap on
3. Then go to Shortcuts and select a shortcut.
4. Or another option, just go directly to the Application Lcd and touch and hold the application.
Thursday, September 11, 2014
How to Root and Instal CWM Recovery on HTC One XL AT T HTC One X
HTC One XL is basically AT & T HTC X, today we shall guide you on how to install CWM on HTC X AT & T or HTC One XL. There is also the Super SU available for HTC One XL / AT & T HTC X, ROM manager is also great to use on this smartphone and today local is very important for the HTC One XL users as its very hard to find something about the HTC One XL. It took me 4 days to find Super SU and CWM recovery for HTC One XL.
In following article we shall guide you step by step how to install CWM recovery on your HTC One XL / HTC X AT & T. before we started the make sure the battery of your smartphone is more than 80% charged, and you backup your call and message data.
Note :
- Your HTC One XL/HTC One X AT&T must be running android 4.1.2 jelly bean .
- Enable USB Debugging Mode by go to Settings>Developers Options >Check USB Debugging Mode.
- This guide is only for HTC One XL.
How To Root and Install CWM Recovery on HTC One XL/AT&T HTC One X.
- First of all unlock bootloader of your smartphone
- Make sure Fastboot/ADB ic installed on your PC.
- Download Super SU and CWM for HTC One XL.
- Now copy CWM Recovery image to fastboot folder and rename it Recovery.
- Turn off your smartphone and then press and hold Volume Down+Power button , when the soft keys blink 6 times release the power button , keep holding volume down button.
- Connect your smartphone with PC.
- Open fastboot folder and then hold Shift Key and press Right click , command prompt will open.
- Type the following command in command prompt :fastboot flash recovery recovery.img
- After the process is done , select Reboot Bootloader.
- Now select Recovery from Bootloader.
- When Recovery is open select following.
- Now select ‘Install zip from sd card’, then select ‘choose zip from sd card’.
- Select the Super SU.zip file and confirm installation.
- After that Go back and reboot smartphone .
- After reboot open App Drawer to check for Super SU App to verify Root Access.
Wednesday, September 3, 2014
How To Easy Root Galaxy S2 Epic 4G Touch SPH D710 Running On Android 2 3 Gingerbread
How to Root Samsung Galaxy S2 Epic 4G Touch - SPH - D710 (Sprint) easily without using a PC but just using your mobile device. You now can root your Galaxy S2 Epic 4G Touch - SPH - D710 running on the latest official firmware to install an application and follow the steps very simple.
Once you rooting Galaxy S2 Epic 4G Touch - SPH - D710 you can actually utilize the hardware as you want. You can overclock, can install root only apps, you can access and modify the file system, can even upgrade to Android version better as Android 4.3 or Android 4.4 Jelly Bean KitKat with flashing custom ROM (if there is available and) if you have a custom recovery installed. You can follow the simple instructions to find and install a custom recovery (CWM recovery or TWRP recovery) on your device.
Disclaimer: This guide is for educational purpose only. Neither True-Android team nor any developers are responsible if your device bricked after following this tutorial. Remember, rooting void your device manufacturer warranty.
Pre Requisites:
1. Backup your device data. You can follow our ultimate backup guide.
2. Make sure your device have at least 60% battery power. You can install an app like Battery Notifier BT Free on your Android device to check it easily.
Hope you back up all your data and settings as mentioned above. So, its time to jump into next stage of this guide.
How To Root Galaxy S2 Epic 4G Touch - SPH-D710 Easily
- Download Framaroot and install it (open a file explorer, navigate your download and tap on it; you can also directly open the apk from browser download section to install it). If you see a warning box then you require to check Unknown sources under Settings –> Security.
- Open the app and then tap on install superuser or super SU of your choice.
- You will see some rooting options. Tap on any of the available rooting method and soon youll see the success message.
To confirm if you successfully rooted your Android device or not install an app called “Root Checker” which is available for free from Google PLAY store.
That’s it! You just learn how to root Galaxy S2 Epic 4G Touch - SPH-D710. And, that’s too without using any computer. You can fill the comment form below to ask additional help from community.
Friday, August 29, 2014
Nokia 5800 power on just variation tested solution here
Nokia 5800 power on just variation tested solution here.
try this solution one by one.
Step1:check bsi line.bsi line cut. apply this jumper.

Step2.try flash same product code.
step3.remove this N2121.

Read More..
try this solution one by one.
Step1:check bsi line.bsi line cut. apply this jumper.

Step2.try flash same product code.
step3.remove this N2121.

Blackberry 8520 hange on blackberry logo 100 tested
blackberry 8520 hange on blackberry logo only solution,blackberry only show blackberry not power on solution, blackberry,8520 hang problem many time update phone for firmware but not solve problem try my solution im solve many phone this way try my solution i hope solve your phone blackberry only hange logo done solution here,
see my solution only red logo ic fast reheat not solve try secound step
change only red logo ic i hope solve your phone 100% .
see my solution only red logo ic fast reheat not solve try secound step
change only red logo ic i hope solve your phone 100% .
If U need 100% working solution have this try and solve hang problem.
How To Install Android 4 3 Jelly Bean on Samsung Galaxy S3 GT I9300
Samsung Galaxy S3 released almost half a year and still Samsung launches Android firmwares update for the Samsung Galaxy S3. Android 4.3 jelly bean for the Samsung Galaxy S3 was launched via OTA you will immediately receive a notification of the OTA to update the firmware but if you do not want to wait for the OTA update to accept you can manually update the Samsung Galaxy S3 on Android 4.3 jelly bean. At this time we will guide you how to install Android 4.3 jelly bean on your Samsung Galaxy S3. In todays tutorial we will be using ODIN if you do not know how to use ODIN first read about how to use Odin then continue with this tutorial. Before we start make sure that the battery of your Samsung Galaxy S3 is charged more than 80% and you have a copy of all records of calls and messages and contacts. Because this method will erase all data on your smartphone.
Note : ”We shall not held responsible if you brick your smartphone using this tutorial or any other damage caused to your smartphone , please follow each step don’t skip any step “.Important Things :
Enable USB Debugging Mode Battery level must be 80% or more This guide is for Sprint Galaxy S3 only EFS
Download Links:
- Ireland (Vodafone): I9300XXUGMJ9_I9300VFGGMJ5_VDI.zip
- Czech Republic (Vodafone): VDC-I9300XXUGMJ9-20131108171323.zip [mirror]
- Greece (Vodafone): VGR-I9300XXUGMJ9-20131108171027.zip [mirror]
- Romania (Vodafone): CNX-I9300XXUGMJ9-20131108165814.zip [mirror]
- Austria (A1): MOB-I9300XXUGMJ9-20131108170141.zip
- United Kingdom (Vodafone): VOD-I9300XXUGMK6-20131216155050.zip [mirror]
- Netherlands (Vodafone): VDF-I9300XXUGMK6-20131220134832.zip [mirror]
- France (SFR): SFR-I9300XXUGMK6-20131220140004.zip [mirror]
- Italy (Vodafone): OMN-I9300XXUGMK6-20131218145837.zip [mirror]
- Czech Republic (Vodafone): VDC-I9300XXUGMK6-20131217095821.zip [mirror]
- United Kingdom: BTU-I9300XXUGMJ9-20131112172342.zip [mirror]
- Brazil: ZTO-I9300UBUGMK6-20131223150506.zip [mirror]
Download ODIN
- ODIN v3.07, v3.06, v3.04, v1.85, v1.83 Download From Here
- ODIN MUTLI DOWNLOADER ALL 4.XX VERSIONS Download From Here
- SAMSUNG USB DRIVERS 1.5.20.0 NEEDED FOR ODIN Download From Here
- ADB & FASTBOOT TOOLS Download From Here
How To Install Android 4.3 Jelly Bean on Samsung Galaxy S3 GT-I9300.??
- Download any of the above firmware and extract files to your PC .
- Turn Off your Samsung Galaxy S3 and turn on in download mode by holding Volume down+Home and Power button , when smartphone starts use volume up to continue .
- Open ODIN and connect your device while its in download mode.
- When your smartphone connects with ODIN the ODIN port will turn yellow with COM port number .
- Now click PDA and select the file with .tar extension.
- In Odin check Auto Reboot and F.Reset options .
- Click Start and wait for the process to complete.
- When the process is completed wait for your smartphone to turn on and when home screen appears unplug your smartphone .
- Now you have Android 4.3 jelly bean installed on your smartphone enjoy.
Tuesday, August 26, 2014
How to Add a Shortcut on Sony Xperia Z1 Homescreen
Just like a desktop, it also works best on any smartphones to add a shortcut on a homescreen. Heres how to do it:
1. On your devices homescreen, touch and hold and empty area until the device vibrates.
2. After doing so, tap on
.
3. Then go to Shortcuts and select a shortcut.
4. Or another option, just go directly to the Application screen and touch and hold the application.
Read More..
1. On your devices homescreen, touch and hold and empty area until the device vibrates.
2. After doing so, tap on
3. Then go to Shortcuts and select a shortcut.
4. Or another option, just go directly to the Application screen and touch and hold the application.
Monday, August 25, 2014
MANUAL How to S OFF Root Install CWM TWRP Recovery on HTC One Max Intl Sprint
How to S-OFF, Root and Install CWM/TWRP Recovery on HTC One Max (Intl./ Sprint/ Verizon)

It has now become a trend among manufacturers to take advantage of the popularity of one of their smartphones by launching a mini version of the device. Samsung started this in the past with the Galaxy S3 Mini and later with the S4 Mini. HTC, a major competitor of the Korean giant, caught the idea and came up with cut-size version of its most popular device the HTC One. And now the company has come up with a maximized variant of the One with a whopping 5.9-inch display to counter Samsung’s Note line phablets.
The HTC One Max has the same premium feel of its predecessor and it’s impressive too but, at the same time, it is pretty bulky. It’s the heaviest phone I have ever carried!! Anyway, if you have this big avatar of the HTC One and are now planning to get rid of its locked bootloader and root it, the present tutorial will help you do that easily. Besides rooting the One Max, we would also tell you how you can install the ClockworkMod or TWRP Recovery on your device.
Warning!
Before you proceed, please be informed that gaining S-Off and root access on your HTC One Max will void its warranty. Moreover, the method given below is considered risky too. That’s to say, it can send your phone to a state of bootloop and might brick it. Whether it be case of success or failure, you’ll be solely responsible for the same. A good tutorial always requires a good follower. The procedure has been duly tested and found working, so just be careful while doing things.
Getting Prepared:
Before to head to the real action, there are a few resources and tools that we need to download. Besides, there are some preparatory steps that you need to make so that things go smooth and nice.
Installing CWM/TWRP and Rooting HTC One Max:
So, having made the preparations described above and downloaded the required files, we can can now proceed to installing a custom recovery on the One Max and root it. Just follow the steps given below:
Read More..

It has now become a trend among manufacturers to take advantage of the popularity of one of their smartphones by launching a mini version of the device. Samsung started this in the past with the Galaxy S3 Mini and later with the S4 Mini. HTC, a major competitor of the Korean giant, caught the idea and came up with cut-size version of its most popular device the HTC One. And now the company has come up with a maximized variant of the One with a whopping 5.9-inch display to counter Samsung’s Note line phablets.
The HTC One Max has the same premium feel of its predecessor and it’s impressive too but, at the same time, it is pretty bulky. It’s the heaviest phone I have ever carried!! Anyway, if you have this big avatar of the HTC One and are now planning to get rid of its locked bootloader and root it, the present tutorial will help you do that easily. Besides rooting the One Max, we would also tell you how you can install the ClockworkMod or TWRP Recovery on your device.
Warning!
Before you proceed, please be informed that gaining S-Off and root access on your HTC One Max will void its warranty. Moreover, the method given below is considered risky too. That’s to say, it can send your phone to a state of bootloop and might brick it. Whether it be case of success or failure, you’ll be solely responsible for the same. A good tutorial always requires a good follower. The procedure has been duly tested and found working, so just be careful while doing things.
Getting Prepared:
Before to head to the real action, there are a few resources and tools that we need to download. Besides, there are some preparatory steps that you need to make so that things go smooth and nice.
- Visit HTC Dev portal, open an account there, click on the Unlock Bootloader icon on the page and unlock the bootloader of your HTC One Max by following the instructions given there. The users of Verizon One Max can download the Rumrunner Tool from below and achieve S-Off and root access
- When you are done with unlocking the bootloader, enable USB Debugging on your device. Open phone Settings> Developer Options and turn on the option. In case you do not find the Developer options under Settings, follow the steps given here.
- Download Android SDK and set it up on your computer. You can also refer to our detailed guide for setting up the ADB/Fastboot.
- Download Fastboot/ADB files and extract the zip: Android SDK Fastboot-ADB.zip
- Download Beaups’ Rumrunner tool.
- Download unsecure kernel file for HTC One Max: Sprint_One_Max_1.16.651.4_Unsecure_kernel.zip
- Download the following SuperUser file and copy it to your device: superuser.zip
- Now download your preferred custom recovery from below:
- CWM Recovery:
- HTC One Max (International): recovery-clockwork-touch-6.0.4.5-t6ul.img
- HTC One Max (Sprint): recovery-clockwork-touch-6.0.4.5-t6spr.img
- HTC One Max (Verizon): recovery-clockwork-touch-6.0.4.5-t6vzw.img
- TWRP Recovery:
- HTC One Max (International): openrecovery-twrp-2.6.3.0-t6ul.img
- HTC One Max (Sprint): openrecovery-twrp-2.6.3.0-t6spr.img
- HTC One Max (Verizon): openrecovery-twrp-2.6.3.0-t6vzw.img
- CWM Recovery:
Installing CWM/TWRP and Rooting HTC One Max:
So, having made the preparations described above and downloaded the required files, we can can now proceed to installing a custom recovery on the One Max and root it. Just follow the steps given below:
- Copy the SuperUser.zip file to your phone.
- Download the CWM/TWRP recovery image file from above and copy it to “Android SDK Fastboot-ADB” folder. The location of the recovery file should be the same as fastboot and ADB files in the folder.
- Connect your HTC One Max to computer via USB cable (do not use USB 3.0).
- Now open a command prompt. To launch command box, press Shift key+Right-click on mouse and from the list of options, select “Open command window here”. Then type in the and issue the following command:adb devices
- If you can see the serial number of your device in the command box, it’s is properly connected.
- Now issue the following line to reboot your device in Bootloader mode:adb reboot bootloader
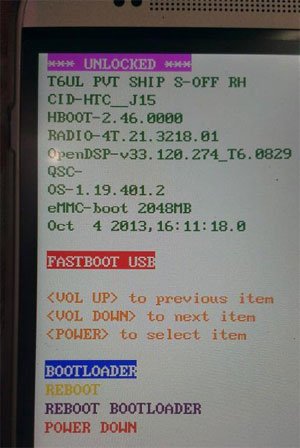
- When you enter the Bootloader/HBOOT mode, highlight FASTBOOT by pressing volume down key and select it using the power button:

- Now open the “Android SDK Fastboot-ADB” folder. Make sure you have already copied the recovery .img file here.
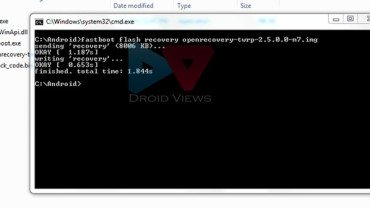
- Launch a cmd window from within this folder (press Shift+Right-click on mouse) and type the command “fastboot flash recovery” followed by the name of the recovery image. For example, if you have downloaded the TWRP recovery image for the Verizon variant, type the following command line in the cmd window (you can replace the recover file name in Red with your own):fastboot flash recovery openrecovery-twrp-2.6.3.0-t6vzw.img
- Now hit the Enter key:

- Your favorite custom recovery will be installed to your HTC One Max within moments.
- Finally, go to REBOOT BOOTLOADER option and select it.
- Scroll to RECOVERY option and select it. You should now be taken to CWM or TWRP recovery interface.
- Now open “install zip from sdcard” (CWM) or “Install” (TWRP) option depending on your recovery.
- Navigate to the SuperUser.zip file and select it.
- Confirm the installation when prompted and let it be installed.
- When SuperUser is flashed, go to REBOOT option and select it.
Sunday, August 24, 2014
How to Start the Smart Connect Application on Sony Xperia Z1 Compact
Wouldnt it be nice if youre phone automatically plays your song list right when you step in your car? Or what about letting you show your whole day agenda the moment you arrive at your work table between 8-9am? These are just examples on how Smart Connect app works. With this app, you can set an event to happen on your device at certain times or what will happen when you connect/disconnect accessories like headset or charger. Hereshow to use it.
1. On your devices home screen, tap on
.
2. Look for Smart Connect and tap on it.
3. If its your first time opening the said app, tap on OK to close the introduction screen.
4. Go to Events tab and tap on the plus (+) icon.
5. Type in a name for the event and tap on Create.
6. Under When, add either an accessory ( like what happens on your device when you connect your headset) or a time interval or could be both.
7. Under Do This, add what you want to happen on your device.
8. Under At the End, add what you want to happen to your device when you disconnect your accessory or when the time interval ends.
9. Press on Back Arrow
to save the event.
Read More..
1. On your devices home screen, tap on
2. Look for Smart Connect and tap on it.
3. If its your first time opening the said app, tap on OK to close the introduction screen.
4. Go to Events tab and tap on the plus (+) icon.
5. Type in a name for the event and tap on Create.
6. Under When, add either an accessory ( like what happens on your device when you connect your headset) or a time interval or could be both.
7. Under Do This, add what you want to happen on your device.
8. Under At the End, add what you want to happen to your device when you disconnect your accessory or when the time interval ends.
9. Press on Back Arrow
to save the event.Saturday, August 23, 2014
How To Guide Install XXUEMKA Android 4 3 JB Firmware on Galaxy Note 2 N7100
Samsung launches Android 4.3 Jelly Bean XXUEMKA official firmware update for the Galaxy Note GT - N7100 2 . The firmware update is launched in various countries including Pakistan , Morocco , United Arab Emirates , Nigeria , Taiwan , Tunisia , Iraq , Afghanistan , Libya and South Africa , and also can be downloaded for manual updates . You can also update your device firmware via Kies or OTA update . Because of this smart phone is equipped with Android 4.1.2 Jelly Bean out of the box , this new firmware update will improve your smartphone to a better OS is Android 4.3 Jelly Bean . Continue reading this guide to find out how to get an official stock Android 4.3 Jelly Bean N7100XXUEMKA firmware running on Galaxy Note GT - N7100 2 . Almost all the possible ways to update your device firmware to this discussion here . One thing should be noted that the official firmware flashing or install kernel then restore root access you will fail , in short it will unroot it .
Android 4.3 Jelly Bean N7100XXUEMKA stock firmware available in both OTA and Kies update. However, if you can not get it from there then you can always blink N7100XXUEMKA Android 4.3 Jelly Bean firmware on Galaxy Note GT-N7100 manual 2. We will discuss all the ways available updates. You should always try OTA or Kies method first and when the second method does not work then just try flashing manually.
Warning: This tutorial is only for Galaxy Note 2 GT-N7100. Don’t try this guide on any other Android device. Also, we are not responsible for any damage caused due to the instruction given in this page. Try this at your own risk. However, it is very unlikely that your device will be damaged if you follow all the instructions as it is which are mentioned in procedure.
Pre Requisites:
Though official firmware restore all existing data but we recommend to back up your data first before proceeding to avoid any uncomfortable situation such as bootloop fix.
1. Backup your device data.
2. Make sure your device have at least 60% battery power. You can install an app like Battery Notifier BT Free on your Android device to check it easily.
3. You already have USB Driver Installed for Galaxy Note 2 GT-N7100 in your PC.Download USB Drivers
4. Make sure USB Debugging is enabled otherwise you won’t able to transfer file between PC and Galaxy Note 2 GT-N7100.
- How To Update Galaxy Note 2 GT-N7100 via OTA
- First of all make sure you have stable internet connection (Wi-Fi or data network) on your device.
- Now, go to Android app drawer and then select Settings.
- Then locate About Device and tap on it.
- Next select Software update from About device screen.
- Then tap on Update option.
- You should see an update, press OK to download and install. (Remember, download using 3G or network data will incur additional charges to your phone bill!)
- Soon your device will reboot to complete the installation process.
If you see “The latest update have already been installed” massage while checking update then your device yet to receive an OTA update. Check back within few days or jump to next procedure.
How To Update Galaxy Note 2 GT-N7100 via Kies
- Make sure you have stable internet connection on your computer.
- Now download and install Samsung Kies on your computer.
- Turn on your device (if it off) and then connect it to computer with USB cable.
- Run Samsung Kies and wait for it to detect your device.
- You should see a New Firmware Upgrade is available at Samsung Kies home screen.
- Press the Firmware Upgrade button to proceed.
- Follow on screen instruction and soon you will see your device running upgrade and reboot automatically. Once done, you can disconnect your device from computer.
Again! If you see “This is the latest firmware” in Samsung Kies, then your device yet to receive the latest update on Kies. Its good time to go for manual update instruction that located below.
[Note: You can install any firmware listed below despite availability in other countries, except those which comes with carrier name.]
N7100XXUEMKA Android 4.3 Jelly Bean Firmware Downloads
Pakistan (PAK): N7100XXUEMKA_N7100OJVEMK3_PAK.zip
Morocco (MAT): N7100XXUEMKA_N7100OJVEMK3_MAT.zip
United Arab Emirates: N7100XXUEMKA_N7100OJVEMK3_LYS.zip
Nigeria: N7100XXUEMKA_N7100OJVEMK3_ECT.zip
Taiwan (WAN): N7100XXUEMKA_N7100OJVEMK3_WAN.zip
Tunisia: N7100XXUEMKA_N7100OJVEMK3_TUN.zip
Morocco (MED): N7100XXUEMKA_N7100OJVEMK3_MED.zip
Morocco (MWD): N7100XXUEMKA_N7100OJVEMK3_MWD.zip
Afghanistan: N7100XXUEMKA_N7100OJVEMK3_AFG.zip
South Africa: N7100XXUEMKA_N7100OJVEMK3_XFE.zip
[Please Note: After flashing this firmware you will lost any installed custom ROM including CM10.2, AOKP, Avatar,Beanstalk, Omni ROM, Slim ROM, Pac-Man, Paranoid Android, LiquidSmooth or Carbon.
How To Install N7100XXUEMKA Android 4.3 Jelly Bean On Galaxy Note 2 GT-N7100 Manually
- Download Odin v3.09.
- Extract Firmware zip file that you downloaded earlier from above link, you will get a .tar.md5 file and some other files (optional).
- Extract Odin zip file and you will get Odin3 v3.09.exe along with few other files.
- Power off your Android device. Wait 5-6 seconds for vibration to confirm complete switch off.
- Now, put the Galaxy Note 2 GT-N7100 in Download Mode by pressing and holding down the Home &Volume Down button together while pressing the Power button. A warning screen will come up; press Volume Up button to enter Download Mode.
- Now run Odin3 v3.09.exe (see Step 3) as an Administrator because Admin privileges is required to complete the process smoothly (only applicable Windows Vista and higher).
- Now connect your device to your PC using USB cable. An “Added!!” massage will appear in Odin’s message box. If you don’t get the same then you should try another USB port (try USB port located in back in your desktop PC). If that too don’t work then you should reinstall the driver. If you successfully see the “Added!!” message in Odin then you are ready to go in next step. You should also see COM port with a number in Yellow if you successfully added your device.
- Click the AP Button, and select that .tar.md5 file that you get in Step 2.
- In Odin window, make sure only Auto Reboot and F. Reset Time checkboxes are selected.
- Double check everything that we mentioned in Step 8 & Step 9 above. Now, once satisfied hit the START button to begin the flashing process.
- Once flashing completed, your Galaxy Note 2 GT-N7100 will restart and soon you will see a PASS message with green background in the left-most box at the very top of the Odin. You can now unplug the USB cable to disconnect your device from computer.
Congrats! You just updated your Galaxy Note 2 GT-N7100 to Android 4.3 Jelly Bean firmware. Go to Settings > About device to verify this firmware update.
Fix Boot Loop Issue On Galaxy Note 2 GT-N7100
If Galaxy Note 2 GT-N7100 stuck at booting animation for more than 10 minutes after Step 11 then follow below instructions:
Go to recovery mode. To do so, press and hold the Volume Up, Home and Power buttons together.
Now perform Wipe data/Factory Reset and Wipe Cache Partition task before selecting reboot system now function. In recovery mode use Volume keys to navigate between options and Power key to select the option.
Please note, performing wiping task will erase your device internal memory data and not external SD card data.
That’s it! Let us know about your latest Android 4.3 Jelly Bean experience.
Friday, August 22, 2014
Saturday, August 16, 2014
Friday, August 15, 2014
Thursday, August 14, 2014
Tuesday, August 12, 2014
Nokia 5230 On Off Power Switch Ways Jumper fix problem
Nokia Mobile 5230 Power switch ways.Not Power On But Charge Show In Display Apply This Jumper How to Fix problem 100% Tested .

Read More..

Sunday, August 10, 2014
Rooting Canadian Samsung Galaxy S4 I337M on Android 4 2 2 JB with CF Auto Root
The Canadian model of the Galaxy S4 can be rooted right away using the CF Auto-Root tool by Chainfire. Use this post to learn how to successfully root your smartphone but, note that this is a guide for advanced Android users and you shouldn’t attempt to use it in case you’ve never rooted any Android devices.
Rooting your smartphone shouldn’t be hard to accomplish, but you still need to know the basics about how to launch Odin and use the phone’s Download Mode in order to flash a rooting firmware. Below you can find several guidelines that should help you complete this tutorial and root the Android 4.2.2 Jelly Bean stock firmware with Chainfire’s CF-Auto-Root tool:
Note that this guide will only root your device, but it won’t install any custom Recovery images.
If the Galaxy S4 Canada model has been rooted you can start installing root-based apps and customize it.
NOTE2: If ODIN says ‘PASS’ but the phone gets stuck at the Samsung boot animation or it enters into a boot loop, then you will have to unplug the phone from PC. Remove the battery, re-insert it and then use the Stock Recovery mode to factory reset the device. This process will delete the contents from your phone’s system partition and force it to boot into normal mode. Here’s how to do that:
Use the comments section below to ask for help in case you cannot complete the root.
Read More..
Rooting your smartphone shouldn’t be hard to accomplish, but you still need to know the basics about how to launch Odin and use the phone’s Download Mode in order to flash a rooting firmware. Below you can find several guidelines that should help you complete this tutorial and root the Android 4.2.2 Jelly Bean stock firmware with Chainfire’s CF-Auto-Root tool:
- use this tutorial only with the Canada model of the Samsung Galaxy S4. Your device should have the I337M model number. Don’t try to root any other Android device using the files you find in this post.
- make sure that your computer has the Samsung USB Drivers installed on it. If yours doesn’t, then you can easily download them from here.
- this guide won’t ask you to factory reset the smartphone but, you might still be forced to do it, in case the Galaxy S4 I337M is incapable of booting after root. You’ll find more info at the end of this post.
- disable any Samsung KIES and antivirus applications from running on your PC. Such apps are usually preventing ODIN, the app used to flash rooting files.
- enable USB debugging option from your phone’s Developer Options menu.
- note that if you root your phone, you will lose the warranty and the binary flash counter will be increased because of this.
- make sure that the phone’s battery has enough power left before discharging completely. If the phone powers off in the middle of the rooting process, you will have to start all over again.
- note that we cannot be held responsible in case you brick your phone or you lose any data in the process. This post should be applied by advanced users.
Note that this guide will only root your device, but it won’t install any custom Recovery images.
How to root Samsung Galaxy S4 I337M Canada model using CF-Auto-Root tool:
- Download the CF Auto Root zip file from here.
- Extract the contents of this zip on your computer. You will get a file named ‘CF-Auto-Root-jfltecan-jfltevl-sghi337m.tar.md5′, don’t extract any further than that.
- Download Odin 3.07 from here. Extract its contents and save them to a single folder.
- Power off your phone completely.
- Boot the SGS4 into Download Mode.
- Launch ODIN exe on your PC.
- Connect the smartphone to computer and wait for ODIN to say ‘Added!!’.
> if ODIN doesn’t confirm that it has connected with your device, you will need to change the USB port or re-install the Samsung USB drivers. A download link for the phone’s drivers is listed in the preparation guide above. - Now, click the PDA button in ODIN.
- Find the ‘CF-Auto-Root-jfltecan-jfltevl-sghi337m.tar.md5′ file and load it into ODIN.
> make sure that the Re-Partition option is not enabled. Don’t change any default ODIN settings. - Next, press the START button when you’re ready for the root to start.
- The process should complete in under 10 minutes and the phone will reboot when all files have been flashed.
- Unplug the phone from PC and then wait for it to boot into normal mode.
- Open the App drawer and check for the SuperSU app icon. That means that the root has been achieved.
If the Galaxy S4 Canada model has been rooted you can start installing root-based apps and customize it.
NOTE2: If ODIN says ‘PASS’ but the phone gets stuck at the Samsung boot animation or it enters into a boot loop, then you will have to unplug the phone from PC. Remove the battery, re-insert it and then use the Stock Recovery mode to factory reset the device. This process will delete the contents from your phone’s system partition and force it to boot into normal mode. Here’s how to do that:
- power off the phone.
- press and hold Volume Up, Home and Power buttons simultaneously.
- release the buttons when the Recovery mode menu loads.
- select ‘wipe data/ factory reset’ and confirm.
- return to the main Recovery menu and select ‘reboot system now’.
- the SGS4 will now boot into normal mode successfully.
Use the comments section below to ask for help in case you cannot complete the root.
Subscribe to:
Posts (Atom)


