Showing posts with label galaxy. Show all posts

Thursday, November 13, 2014

How To Update Samsung Galaxy Note 3 Neo SM N750 and SM N7505 Firmware Version

This Tutorial will show you the right steps to update the software of your Samsung Galaxy Note 3 Neo, We will explain here the needed steps one by one in a clear and easy way, You can use this Guide to update the both models, SM-N750 and SM-N7505 LTE model, All you should take care of is selecting the right firmware package for each model, Never try to flash the SM-N750 model with SM-N7505 firmware files, And vice versa.

The Galaxy Note 3 Neo is powered by Exynos 5260 Chipset, Quad-core 1.3 GHz CPU, It has Mali-T624 GPU, You can enjoy the 2GB of RAM memory which gives you a good space to run your application smoothly, The Li-Ion 3100 mAh Battery offers up to 18 hours of talk time. Like many other Samsung new models the Galaxy Note 3 Neo has some basic specs like Bluetooth, WiFi, NFC, GPS, And much more. The Android OS v4.3 Jelly Bean is pre-installed too.
Preparation Steps:
1- Check the current firmware of your mobile, You can check it from Setting > About Phone, Or you can use this easy code *#1234#
2- It is a good idea to write down your device current firmware version, It will be useful later, In case something goes wrong.
3- Charge your mobiles battery to be at least at 90% of charging level.
4- Updating your mobiles firmware will delete everything from your device internal memory, So read this Guide to learn how you can make a backup of your important data (SMS, Contacts, Notes...etc).
5- In case you have an external memory card inserted into your mobile, Then remove it.
6- Download the Samsung USB Driver, And install it, Then restart your computer.
7- Download Odin3 program (Original Android Flasher), Extract to your computers desktop.
8- Download The Firmware package (N750 | N7505), Select the version you want to install it into your mobile.
9- Extract the firmware package to a known location on your computer.

Odin3 Settings:
1- Double click on Odin3.exe to run it.
2- These settings must be checked: Auto Reboot, F.Reset Time.
3- If you have the PIT file of your Samsung model, Then check: Re-Partition
Firmware Files Selection: Here we used N7505 firmware files as example
- Click on PIT button and select: HL3G_EUR_OPEN_4G.pit (N750), HLLTE_EUR_OPEN_4G.pit (N7505)
- Click on BL button and select: BL_N7505xxxxxxx_2477720_REV00_user_low_ship.tar
- Click on AP button and select: AP_N7505xxxxxxx_2477720_REV00_user_low_ship.tar
- Click on CP button and select: MODEM_N7505xxxxxxx_REV00_CL1490690_SIGNED
- Click on CSC button and select: CSC_xxx_N7505xxxxxxx_2477720_REV00_user_low_ship.tar
Putting your Galaxy Note 3 Neo into Download Mode:
At this step you have to turn off your Samsung cell phone, Take out its battery and SIM card, Then read this Guide to put it in Download Mode, To be able to install the new firmware into you device your should put it into this mode.

Installing the new Firmware into your Samsung Galaxy Note 3 Neo device:
1- After you put your mobile into Download Mode, Use the USB cable to connect it to your computer.
2- You have to wait until Windows detects the device and installs any needed drivers.
3- Look at Odin3 programs window, If the program detects your connected device correctly, You should see its COM Port number (0:[COMxx]).
4- You are ready to install the new firmware files into your Samsung Galaxy Note 3 Neo, Click Start button to begin.
5- After you click the Start button, Odin3 program will start to install the selected firmware files into the connected device.
6- Odin3 program will restart your Samsung mobile automatically after installing the firmware.
7- Wait until your mobile is restarted.
8- Look again at Odin3 programs window, If you see PASS! Word in green, Then the update was done successfully.
9- Disconnect your mobile.
10- When the mobile is fully on, Check the new installed firmware version.
11- Now you are ready to use the device, So reinsert the SIM and Memory cards, Restore your backup, And customize it.
Read More..

Friday, September 26, 2014

CREED V4 for Samsung Galaxy Y GT S5360

 Feautures found Over:-

  • most advanced touchwiz launcher (creeds home)
  • 13 seconds to bootup
  • performance hacks
  • display+sound hacks
  • 15 status bar toggles
  • swipe to remove notification
  • extended power menu
  • 7 lockLcd mod
  • various new settings. And Much More On....
Patches:-
 

->Galaxy
->Wall
->Lights
->Appear (3.5 Stock)
->Transformers
->Dance in Brown
->Simple Green


HOW TO FLAST THE ROM:-
 

[So Here am I with for the one You waiting For and Scrolling too.. Now Ill give u a perfect Way to Flash this Custom Rom... You would be Thinking this one Would be as Same as the one which Normally others are but not Like it Now.!! This One is Quite Different from Others.]

1.Copy the the CreedV4.zip files to your SD card. [Note:- Not In Any Folder]
  
2. Turn off your phone and boot to Recovery Mod by pressing these buttons: volume up+home+power button. In Recovery you cant use the touch Lcd ..Can Operate only the buttons.

Volume up: Navigating UP Volume down: Navigating Down Home: Enter Power: Back

3. Navigate through Volume Up and Down:- 
i. Factory Data Reset 
ii. Clear Cache Partition 

4. After data wipe move to install zip from SD Card, then choose Update from SD and navigate toCreed.zip andPress the Home Button 

5. Wait until the installation ends. 
6. The first boot can take a long time.


7. After Phone Gets Switched On.. complete the Formalities asked by the Phone. and Now you are with the one of the Latest and Fastest custom Rom For Samsung Galaxy Y which no one could ever Dream Of Too... 

Read More..

Wednesday, September 24, 2014

How to Update Samsung Galaxy Fame S6810 With Android 4 1 2 XXAMJ1 Jelly Bean Official Firmware Install Odin Guide


Samsung Galaxy Fame with model number GT-S6810 has already received the latest Android 4.1.2 Jelly Bean update with firmware build number S6810XXAMJ1. The new official firmware is currently available as an Over-The-Air (OTA) update as well as through Samsung KIES.
Firmware details
PDA: S6810XXAMJ1
CSC: S6810OLBANB1
MODEM: S6810DXAMG1
Version: Android 4.1.2
Build date: Oct 1, 2013
Regions: Indonesia, Vietnam
Samsung Galaxy Fame S6810 users who missed the OTA update notification or unable to access the update over Samsung KIES, can now download and install the same manually using our step-by-step guide.
Pre-requisites
1. Install USB Drivers for Samsung Galaxy Fame on the computer.
2. Enable USB Debugging Mode on the phone by navigating to Settings >> Developer Options.
3. Make a backup of all your important data before following the guide.
4. The Galaxy Fame should be factory unlocked and not locked to any particular carrier.
5. Ensure the battery of the phone is charged more than 80 percent.
6. The Android 4.1.2 XXAMJ1 Jelly Bean firmware is compatible only with Samsung Galaxy Fame (GT-S6810L). Applying this to any incorrect variant might brick the device. Verify the model number of the Galaxy Fame by navigating to Settings >> About Phone.

Files Required
1. Android 4.1.2 XXAMJ1 Jelly Bean Firmware for Galaxy Fame S6810
2. Odin 3.07
Related Article:How to Update Galaxy Fame S6810L with Android 4.1.2 UBANA1 Jelly Bean Official Firmware
Steps to Update Galaxy Fame S6810 with Android 4.1.2 XXAMJ1 Jelly Bean Firmware
Step 1: Extract Firmware zip file using WinRAR/7-Zip/WinZip or any other extracting tool, you will get a .tar.md5 file and some other files (optional).
Step 2: Extract Odin zip file and you will get Odin3 v3.07.exe along with few other files.
Step 3: Switch off the Galaxy Fame.
Step 4: Boot the device into Download Mode by pressing and holding Volume Down, Home and Power buttons together until a construction Android robot icon with a warning triangle appears on Lcd. Now press the Volume Up button to enter Download Mode.
Step 5: Run Odin on the computer as an Administrator.
Step 6: Connect the Galaxy Fame to the computer using USB cable while it is in the Download Mode. Wait until Odin detects the device. When the device is connected successfully, the ID: COM box will turn to light blue with the COM port number. Additionally, the successful connected will be indicated by a message saying Added.

Step 7: Select the following files in Odin from extracted S6810XXAMJ1 firmware folder:
  • Click the PDA button and select the .tar.md5 file.
  • Click the Phone button and select file with MODEM in its name. Ignore if there is no such file.
  • Click the CSC button and select file with CSC in its name. Ignore if there is no such file.
  • Click the PIT button and select the .pit file. Ignore if there is no such file.
Step 8: In Odin, enable Auto Reboot and F. Reset Time checkboxes. Also, ensure the Re-Partition checkbox is chosen only if a .pit file was chosen in the previous step.
Step 9: Verify everything suggested in Step 7 and Step 8 is done correctly. Then hit the Start button to begin the installation process.
Step 10: Once the installation process completes, your phone will restart and soon you will see a PASS message with green background in the left-most box at the very top of the Odin. You can now unplug the USB cable to disconnect it from the computer.

Samsung Galaxy Fame S6810 should be now updated with Android 4.1.2 XXAMJ1 Jelly Bean official firmware. Head over to Settings >> About Phone to verify the software version running on the device.

Note: If Galaxy Fame S6810 stuck at booting animation after Step 10 then go to recovery mode (press and hold the Volume Up, Home and Power buttons together) and perform Wipe data/Factory Reset and Wipe Cache Partition task before selecting reboot system now function. In recovery mode use Volume keys to navigate between options and Power key to select the option. Please note, performing wiping task will erase your device internal memory data and not external SD card data.

Read also: How to Root Galaxy Fame S6810 on Android 4.1.2 Jelly Bean Firmware
Read More..

Monday, September 22, 2014

how to root galaxy young GT S5360


actually what is the root??
Root is a user who has the ability to leverage and free to do whatever he wants to do on the android system
then what does it do??
Root serves to give the user full rights on the Android to be able to get into the Android system

Before we start it we think its no good because many want first ngeroot hp Android but before it pertimbangin first because when its in the root of the official guarantee that he will have lost his shortcomings

WARNING!!!
If it turns out there is damage or fail when / after rooting, Im not responsible, because I just ter-share. Previously suggested doing backups of important data beforehand ok

1. First download the files needed for rooting remember! Never in extracts
2. Copy update.zip to the microSD card should not be placed in the folder
3. Turn off your android smartphone
4. Press the power button, volume up and home button simultaneously to enter recovery mode
5. Select Apply update from sd card
6. Then select the file update.zip

7. Wait a moment, ....
if it says installed from sd cardcomplete means success rootingnya

8. Reboot and happy & successful (for the success) you are already in the Android status
Rooted.
9. To prove there is a new application with a skull icon named superuser.

WARNING!

Rooting is one of the best way if you want to explore on the Android system. With rooting, then you can access all the files and can install any application you want. But keep in mind, not all of the rooting process can proceed smoothly (which is caused by many things).

CONCLUSION!
Root Android the process is useful for open access to the Android system. Android gains root outline is to have complete control of Android. The complete control if not done carefully can cause damage to the system. So, if you still feel satisfied or fairly with Android capabilities and facilities owned, then the root process should not have done.
Read More..

Saturday, September 20, 2014

Samsung Galaxy Note Manual GT N7000 factory data reset

Samsung
Samsung Galaxy Note Manual GT N7000 factory data reset

Performing factory data reset ( master reset or hard reset ) Samsung Galaxy Note Manual GT N7000 via Settings menu:


  1. select Applications from home Lcd
  2. select Setting
  3. select Privacy
  4. select Factory data reset
  5. select Erase everything ( master reset )
  6. select Done


Warning! All data will be erased from device memory, including system and application data, settings and downloaded applications. Back up your important data.  The device will restore to factory settings.

If your phone hangs or does not responding, Press and hold power key about 10 seconds.  It will rebooting automatically.  Or remove and re insert the battery and SIM Card.
Read More..

Wednesday, September 10, 2014

samsung galaxy i9001 Problem with the screen Albezae send and receive

samsung galaxy i9001 Problem with the Lcd Albezae send and receive


Read More..

Wednesday, September 3, 2014

How To Easy Root Galaxy S2 Epic 4G Touch SPH D710 Running On Android 2 3 Gingerbread

How to Root Samsung Galaxy S2 Epic 4G Touch - SPH - D710 (Sprint) easily without using a PC but just using your mobile device. You now can root your Galaxy S2 Epic 4G Touch - SPH - D710 running on the latest official firmware to install an application and follow the steps very simple.
Once you rooting Galaxy S2 Epic 4G Touch - SPH - D710 you can actually utilize the hardware as you want. You can overclock, can install root only apps, you can access and modify the file system, can even upgrade to Android version better as Android 4.3 or Android 4.4 Jelly Bean KitKat with flashing custom ROM (if there is available and) if you have a custom recovery installed. You can follow the simple instructions to find and install a custom recovery (CWM recovery or TWRP recovery) on your device.

Disclaimer: This guide is for educational purpose only. Neither True-Android team nor any developers are responsible if your device bricked after following this tutorial. Remember, rooting void your device manufacturer warranty.

Pre Requisites:

1. Backup your device data. You can follow our ultimate backup guide.
2. Make sure your device have at least 60% battery power. You can install an app like Battery Notifier BT Free on your Android device to check it easily.

Hope you back up all your data and settings as mentioned above. So, its time to jump into next stage of this guide.

How To Root Galaxy S2 Epic 4G Touch - SPH-D710 Easily

  1. Download Framaroot and install it (open a file explorer, navigate your download and tap on it; you can also directly open the apk from browser download section to install it). If you see a warning box then you require to check Unknown sources under Settings –> Security.
  2. Open the app and then tap on install superuser or super SU of your choice.
  3. You will see some rooting options. Tap on any of the available rooting method and soon youll see the success message.
To confirm if you successfully rooted your Android device or not install an app called “Root Checker” which is available for free from Google PLAY store. 

That’s it! You just learn how to root Galaxy S2 Epic 4G Touch - SPH-D710. And, that’s too without using any computer. You can fill the comment form below to ask additional help from community.
Read More..

Monday, September 1, 2014

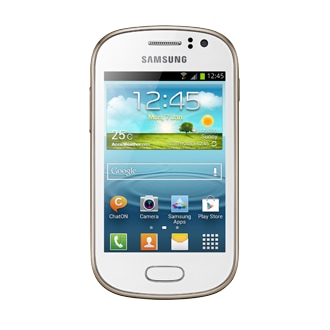
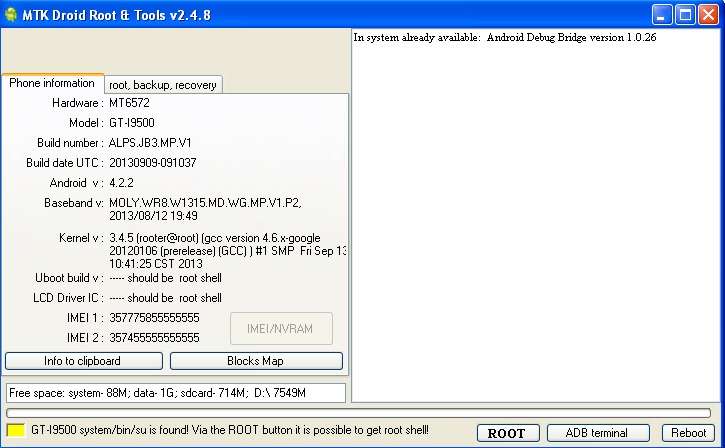
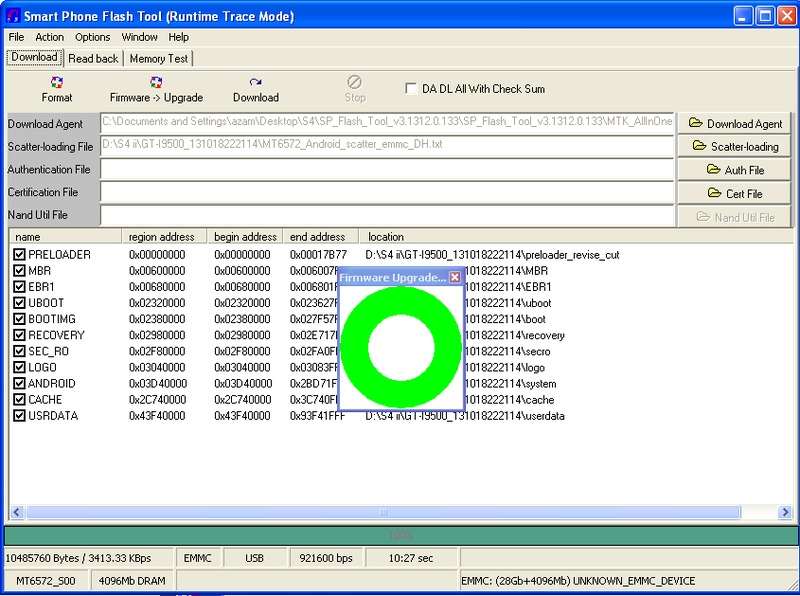
Samsung Clone Galaxy S4 i9500 MT6572 Tested Rom Here

Samsung Clone Galaxy S4(i9500) MT6572 Tested Rom Here

Firmware Details:


Successfully Flashed & Recovered


Read More..

Sunday, August 31, 2014

Samsung Galaxy Ace 3 LTE S7275R with Android 4 2 2 XXUANA3 Jelly Bean Official Firmware How To Guide


Android
Samsung Galaxy Ace 3 with LTE connectivity has just received the latest Android 4.2.2 Jelly Bean update with firmware build number S7275RXXUANA3. The new official firmware is now available as an Over-The-Air (OTA) update as well as through Samsung KIES.
Firmware details
PDA: S7275RXXUANA3
CSC: S7275ROLBANA1
MODEM: S7275RXXUAML1
Version: Android 4.2.2
Build date: Jan 13, 2014
Regions: Singapore, Malaysia
Samsung Galaxy Ace 3 (LTE) S7275R users who missed the OTA update notification or unable to access the update over Samsung KIES, can now download and install the same manually using our step-by-step guide.
Pre-requisites
1. Install USB Drivers for Samsung Galaxy Ace 3 on the computer.
2. Enable USB Debugging Mode on the phone by navigating to Settings >> Developer Options.
3. Make a backup of all your important data before following the guide.
4. The Galaxy Ace 3 should be factory unlocked and not locked to any particular carrier.
5. Ensure the battery of the phone is charged more than 80 percent.
6. The Android 4.2.2 XXUANA3 Jelly Bean firmware is compatible only with the LTE version of Samsung Galaxy Ace 3 (GT-S7275R). Applying this to any incorrect variant might brick the device. Verify the model number of the Galaxy Ace 3 by navigating to Settings >> About Phone.

Files Required
1. Android 4.2.2 XXUANA3 Jelly Bean Firmware (Mirror Link) for Galaxy Ace 3 (LTE) S7275R
2. Odin 3.07 (Mirror Link)

Steps to Update Galaxy Ace 3 (LTE) S7275R with Android 4.2.2 XXUANA3 Jelly Bean Firmware
Step 1: Extract Firmware zip file using WinRAR/7-Zip/WinZip or any other extracting tool, you will get a .tar.md5 file and some other files (optional).
Step 2: Extract Odin zip file and you will get Odin3 v3.07.exe along with few other files.
Step 3: Switch off the Galaxy Ace 3.
Step 4: Boot the device into Download Mode by pressing and holding Volume Down, Home and Power buttons together until a construction Android robot icon with a warning triangle appears on screen. Now press the Volume Up button to enter Download Mode.
Step 5: Run Odin on the computer as an Administrator.
Step 6: Connect the Galaxy Ace 3 to the computer using USB cable while it is in the Download Mode. Wait until Odin detects the device. When the device is connected successfully, the ID: COM box will turn to light blue with the COM port number. Additionally, the successful connected will be indicated by a message saying Added.

Note: If the Added message does not appear, then try re-install USB drivers or changing the port on the computer.

Step 7: Select the following files in Odin from extracted S7275RXXUANA3 firmware folder:
  • Click the PDA button and select the .tar.md5 file.
  • Click the Phone button and select file with MODEM in its name. Ignore if there is no such file.
  • Click the CSC button and select file with CSC in its name. Ignore if there is no such file.
  • Click the PIT button and select the .pit file. Ignore if there is no such file.
Step 8: In Odin, enable Auto Reboot and F. Reset Time checkboxes. Also, ensure the Re-Partition checkbox is chosen only if a .pit file was chosen in the previous step.
Step 9: Verify everything suggested in Step 7 and Step 8 is done correctly. Then hit the Start button to begin the installation process.
Step 10: Once the installation process completes, your phone will restart and soon you will see a PASS message with green background in the left-most box at the very top of the Odin. You can now unplug the USB cable to disconnect your device from the computer.

Samsung Galaxy Ace 3 (LTE) S7275R should be now updated with Android 4.2.2 XXUANA3 Jelly Bean official firmware. Head over to Settings >> About Phone to verify the software version running on the device.

Note: If Galaxy Ace 3 (LTE) S7275R stuck at booting animation after Step 10 then go to recovery mode (press and hold the Volume Up, Home and Power buttons together) and perform Wipe data/Factory Reset and Wipe Cache Partition task before selecting reboot system now function. In recovery mode use Volume keys to navigate between options and Power key to select the option. Please note, performing wiping task will erase your device internal memory data and not external SD card data.
Read More..

Saturday, August 30, 2014

How To Hard Reset Factory Reset Samsung SGH I535 Galaxy S3 From Verizon Key Combination Method

The Hard Reset / Factory Reset operation can fix many software related errors and problems:

- After installing bad or unsupported application into your Samsung mobile phone which causes your phone to be frozen.
- Your Samsung mobile phone doesnt respond to any order after booting because of some software errors.
- Forgotten pattern lock in Samsung Android mobile phones.
- Forgotten user code.
- Forgotten phone code.
- Before or after installing new firmware updates into your device.
- Before selling the device to Wipe all your saved data.

Before performing the Hard Reset:

- In case your Samsung mobile phone can connect to a computer then it is better to make a backup of your saved data using Samsung kies software.
- But in case that is not possible then you can check that your phones battery has enough charging, Otherwise you should charge it.

Samsung SGH-I535 Galaxy S3 From Verizon Hard Reset Steps:

- Take out your phones battery, SIM-card and memory card too.

- After 10 seconds put the battery back into your phone.

- Press and hold Volume Up key + Home key then press Power key.

- Keep pressing the above keys until Samsung logo appears,Then when you see the green android man release all keys.

- You will get Factory reset / System Recovery menu.

- Use Volume Down key to select Wipe Data / Factory Reset option.

- Use Power key to confirm the operation.

- You need to use the Volume Down key again to select "Yes -- delete all user data".

- Use Power key to confirm.

- After performing the hard reset, Select Reboot System Now option, And confirm it using Power key.

- Now the phone will reboots, Wait for it to be fully on and then you can start using it.


Notice: The hard reset operation will delete anything that are saved in your phones internal memory, So make a backup of your data in case you can access them.

Read More..

Samsung Galaxy S5 Tips and Tricks

How to Factory Reset (Hard Reset)

We have our own reasons why we factory reset our device. Maybe we want to delete all the files and restore the device to its original state. It could also be the device may be malfunctioning or so slow and it needs to be reset.

Restoring the default settings or factory reset your Samsung Galaxy S5 will delete all your existing files. It is recommended to backup your important files on your computer before attempting to reset your device.

The steps below are the instructions on how to factory reset your Samsung Galaxy S5:

Step 1. On your Homescreen, tap on MENU icon.

Step 2. Select Settings, then scroll down and tap Backup and reset option.

Step 3. Then tap on Factory Data Reset.

Step 4. Read warning carefully before tapping the Reset Device.

Step 5. If you want to proceed in resetting your device, tap on Delete All to confirm the Factory Reset.

Now, you just need to wait while your device is resetting. It should reboot itself and you will have a new start on your Samsung Galaxy S5.

If your Galaxy S5 is unresponsive, then you may need to do the Hard Reset.

  • Press and hold the Power buttonVolume Up and the Home Key at the same time. 
  • Hold these buttons until your phone vibrates, then release the Power button.
  • Hold the Volume Up and the Home Key until you see the Android icon.
  • Then choose the Factory Reset option.


How to Reduce the Battery Consumption

All of us want to have a longer battery life on our phones. Well, Samsung S5 provides options that help you save battery power. By customizing these options and deactivating features in the background, you can use the device longer between charges:

To reduce the battery consumption, follow these simple tips:

● You need to Activate Power saving mode.

● Switch to Sleep mode by pressing the Power key when you are not using your device. Close unnecessary applications with the task manager.

● Deactivate the Bluetooth feature.

● Deactivate the Wi-Fi feature when not in use.

● Deactivate auto-syncing of applications.

● Decrease the backlight time.

● Decrease the brightness of the display.


How to Import Contacts From Old Phone to New Phone (on Sony, iPhone, Samsung, HTC and Nokia)

Contacts is very important for everyone of us. We cant connect to our friends without a contact number. If you have a new phone, saving contacts on the phone one by one is so hassle. But now, theres an easy way how to transfer or import your contacts from your old phone to your new phone.

Use your PC to transfer contacts to your new phone. This process is applicable in several phone brands, including iPhone, Samsung, HTC and Nokia.

You just need an Internet Connection on your PC, your old and new phone and their own USB cable.

Then you need to install the PC Companion program. This is a free application and the installation files are already saved on your new phone. This program can also be used in updating your phone software.

Please note that if you are using the Microsoft Windows 7 operating system on your PC, make sure that the AutoPlay setting is enabled.

To check your settings:

Click Start > Control Panel, then type "autoplay" on the search box. Click the AutoPlay, and mark the check box Use AutoPlay for all media and devices.

Installing the PC Companion:

  • Turn on your new Phone and connect it to your PC.
  • On your new Phone, tap "Install" to install PC Companion on the PC.
  • On your computer, if a pop-up window that appears notifies you about available PC Software, select Run Startme.exe.
  • Then click Install to start the installation and then follow the instructions to complete the installation.

If you are not prompted with a pop-up window to install the PC Companion, you can also download the PC Companion here.

Transferring your contacts to your new phone:

  • Make sure that PC Companion is installed on your PC.
  • Open the PC Companion application on your PC.
  • Then click Contacts Setup and follow the instructions to transfer your contacts.

How to Change Font Size and Style

Android phones running older version of OS can easily allow you to change its font size. However, changing its font style requires rooting of your device or installing 3rd party apps. Well the good news is, Samsung Galaxy S5 allows you to customize your phone’s font with just few taps. So if you think your S5’s font is way too serious to fit your personality, then you can change into a more light-hearted one. Check out these steps on how to change S5’s font size and style to suit your style.

To change the font size, follow these steps:

1. On your device, go to Settings menu by pulling down the Notification drawer.

2. Now you’re on the Settings menu, scroll down to Display and tap.

3. Under Font, tap on Font Size.

4. You’ll see five options (tiny, small, normal, large and huge) to choose from. Just choose from the list and you’ll immediately see the results within the Settings menu screen.


To change the font style, follow these steps:

1. Pull down the Notification drawer and tap on Settings icon.

2. Then scroll down to Display and tap.

3. Under Font section, tap on Font Style.

4. You’ll see four font style ( default font, Choco cooky, Helvetica S, Rosemary)

5. Choose the desired font style and tap on Yes to apply it. Take note that fonts on a web page will still be displayed as they always have.

6. Now if you wish to use other fonts, just tap on the tab Get fonts online at the bottom of the list for available font styles.

7. Once you tap that tab you’ll be redirected to Google Play Store where you can download additional fonts for S5. Some are free and others cost on average of $0.99.


How to Disable Face Tag

Samsung Galaxy S5 and Note 2 have a feature called the Face Tag which lets you tag your friends on a photo by tapping the yellow boxes over their faces. Yes, it works more like the usual Facebook photo tagging. However, this app is sometimes distracting to look at whenever you view a photo because of the yellow boxes. Now here’s how you can ditch those boxes for a neater photo viewing.

1. Open the Gallery application and select a photo to view.

2. Press on the Menu key and list of options will pop up. Then select Face tag

3. A Face tag switch will appear. Click on the “Off” radio button.

There you go! Hello to a yellow-box free photo. You now have disabled the Face tag app.


How to Take a Screenshot

Posting a screenshot of text thread on Facebook is viral these days. Most of the time, it’s meant for a good laugh. Well, there are actually two ways on how you can capture a screenshot of your Galaxy S5. Here are ways on how you can do it. 

1. Using your device, press and hold the home button and at the same time press and hold the power button on the side. Press and hold those two buttons simultaneously for couple of seconds. Go to your notification bar on top to see the captured screen. Of course, make sure that you’re on the screen that you wish to capture.

2. This one is simpler. Just swipe the side of your hand from left to right or vice versa to take a screenshot. To activate that hand motion, press on the Menu button on your device. Then go to Settings and select Motion. Scroll down to Hand Motion. Tick on the Palm Swipe to Capture motion to activate the said functionality.

Now you’re ready that snap!


How to Take a Photo with Your Device While Recording a Video

Samsung’s flagship and perhaps its best seller Smartphone, the Samsung Galaxy S5 has incredible features to brag. One of which is the ability to take a photo while recording a video. Check out these steps and discover what a piece of art you have there with your S5.

1. Take your S5 and open your camera app. It will let you choose between the standard camera shots or video footage. You can take a video either on a portrait or landscape mode.

2. Once you’ve switched to record a video, press on that red button to begin recording. And a camera button will appear next to the record/stop icon.

3. Now if you wish to take a photo in the middle of recording a video, just press on the camera icon. Notice that there is no sound but just a little flash and momentary change of color after taking the shot.

4. To check on the photos, press on stop button and press on that square icon with lines beside it to get to the gallery page of your device.

5. There’ll you see the video youve recorded and as well as the photos taken while on it.


How to Make Your Device a Wi-Fi Hotspot

Ever imagine how you can make your own Samsung Galaxy S5 a WiFi hotspot? Well, sure you can. This feature allows for your other devices to pick up your mobile hotspot settings on your Samsung Galaxy S5. This is more preferable when you’re in public trying to locate a WiFi connection. Nokia did not mention how many devices can connect to your Samsung Galaxy S5, but usually it is 6-8 devices. Check out these steps for easy, convenient and a money-saver internet experience.

1. In the Application list, select Settings.

2. Then tap on More Settings.

3. Choose Tethering and portable hotspot.

4. Tap on Portable Wi-Fi hotspot

5. Then drag the Portable Wi-Fi hotspot switch to the right to activate mobile network sharing via Wi-Fi

6. Select Configure to configure network settings to use your device as an AP.

7. Tap on Save.

8. Now, on another device, locate your device’s name and connect to your mobile network.

You can also restrict mobile network sharing to specified devices. Select Allowed device list, create a device list, and then select your device’s name to change the sharing mode to Only allowed devices.


How to Connect your Device to a TV

With Samsung Galaxy S5, you can connect this device to a TV to display your devices screen onto the big tube. This also allows you to control your TV remotely using your device. Heres how you can connect your smartphone to your TV.

1. First select a country and a region then tap

2. Go to Set up Now and just follow the on screen instructions to register the TV on your device.

3. To connect to other devices, tapand go to Settings.

4. Choose My Room and then Add devices.


How to Use Screen Mirroring Feature on Samsung Galaxy S5

A feature found in Samsung Galaxy S5, Screen Mirroring on Samsung Galaxy S5 lets your device connected to a large screen using accessories like AllShare Cast dongle or Homesync which you can share your devices contents to a TV. Screen Mirroring can also be use to share contents with other devices using the Wi-Fi Miracast feature. Take note that this feature may not be available depending on the region or service provider.

1. On your devices Applications screen, tap on Settings.

2. Then go to Connections.

3. And select Screen Mirroring. Drag the Screen Mirroring switch to the right.

4. Now you can select a device or perhaps open or play a file. Control the screen display using the keys on your smartphone.


How to Use S Health

Use this application to monitor your health. Tap S Health on the Applications screen.

Setting profile

Tap Next, read and agree to the terms and conditions, and then tap Next. Enter your physical statistics and then tap Start.

Note: Based on your physical statistics, the device calculates your basal metabolic rate (BMR) and recommends a daily caloric intake. The recommendation may not be accurate for all ages, body compositions, or nutritional needs.

Checking your health information

You can view your information on the health board screen. Select one of the following to view details:

• Calories burnt: View how many calories you have burned.
• Calorie intake: View how many calories you have ingested.


How to use Cloud

Use this feature to sync files or back up settings and application data with your Samsung account or Dropbox.

On the Applications screen, tap Settings Accounts Cloud.

Note: This feature may not be available depending on the region or service provider.

Syncing with the Samsung account

Tap your Samsung account or Sync settings to sync files.

Backing up or restoring data

Tap Backup to back up or restore data with your Samsung account.

Syncing with Dropbox

Tap Link Dropbox account, and then enter the Dropbox account. Follow the on-screen instructions to complete the setup.

Once you sign in, tap Allow and the device automatically syncs files with Dropbox whenever you make some changes.


Play Store

Use this application to purchase and download applications and games that are able to run
on the device.

Tap Play Store on the Applications screen.

Note: This application may not be available depending on the region or service provider.

Installing applications

1. Browse applications by category.
2. Tap Search icon to search with a keyword.
3. Select an application to view information.
4. To download it, tap Install.

If there is a charge for the application, tap the price, and follow on-screen instructions to complete the purchase process.

Note:
• When a new version is available for any installed application, an update icon appears at the top of the screen to alert you to the update. Open the notifications panel and tap the icon to update the application.
• To install applications that you downloaded from other sources, on the Applications screen, tap Settings → More → Security → Unknown sources.

Uninstalling applications

Uninstall the applications purchased from Play Store.

1. Tap Two Horizontal Lines My Apps.
2. Select an application to delete in the list of installed applications.
3. Then tap Uninstall.


Rearranging items

Adding an application icon

1.On the Home screen, tap Apps.
2. Tap and hold an application icon.
3. Then drag it into a panel preview.

Adding an item

Customise the Home screen by adding widgets, folders, or pages.

Tap and hold the empty area on the Home screen, and then select one of the following categories:

• Apps and widgets: Add widgets or applications to the Home screen.
• Folder: Create a new folder.
• Page: Create a new page.

Moving an item

1. Tap and hold an item.
2. Drag it to a new location.
3. To move it to another panel, drag it to the side of the screen.

Removing an item

1. Tap and hold an item
2. Drag it to the rubbish bin that appears at the top of the Home screen.
3. When the rubbish bin turns red, release the item.

Setting wallpaper

Set an image or photo stored in the device as wallpaper for the Home screen.

On the Home screen, tap Two Horizontal Line icon → Set wallpaperHome screen, and then select one of the following:

• Gallery: See photos taken by the device’s camera or images downloaded from the Internet.
• Live wallpapers: See animated images.
• Wallpapers: See wallpaper images.

Then, select an image and tap Set wallpaper. Or, select an image, resize it by dragging the
frame, and then tap Done.


Using widgets

Widgets are small applications that provide convenient functions and information on your Home screen. To use them, add widgets from the widgets panel to the Home screen.

Note:
• Some widgets connect to web services. Using a web-based widget may result in
additional charges.
• The widgets available may vary depending on the region or service provider.

Adding widgets to the Home screen

1. On the Home screen, tap Apps.
2. Then select Widgets.
3. Scroll left or right on the widgets panel, and then tap and hold a widget to add it to the Home screen.

Using the setting shortcut widget

1. On the Home screen, tap Apps
2. Then select Widgets.
3. Then tap and hold Settings Shortcut to open a list of setting options.
4. Select a setting option to add it to the Home screen as a shortcut.


Connecting to a Wi-Fi network

Connect the device to a Wi-Fi network to use the Internet or share media files with other devices. (p. 119)

Turning Wi-Fi on and off

Open the notifications panel, and then tap Wi-Fi to turn it on or off.

Note:
• Your device uses a non-harmonised frequency and is intended for use in all European countries. The WLAN can be operated in the EU without restriction indoors, but cannot be operated outdoors.
• Turn off Wi-Fi to save the battery when not in use.

Joining Wi-Fi networks

1. On the Applications screen, tap Settings
2. Select Connections 
3. Then choose Wi-Fi.
4. Then drag the Wi-Fi switch to the right.
5. Select a network from the list of detected Wi-Fi networks.
6. Enter a password if necessary, and then tap Connect.

Networks that require a password appear with a lock icon. After the device connects to a Wi-Fi network, the device will automatically connect to it any time it is available.

Adding Wi-Fi networks

If the desired network does not appear in the networks list, tap Add Wi-Fi network at the bottom of the networks list. Enter the network name in Network SSID, select the security type and enter the password if it is not an open network, and then tap Connect.

Forgetting Wi-Fi networks

Any network that has ever been used, including the current network, can be forgotten so the device will not automatically connect to it. Select the network in the networks list, and then tap Forget.


Connecting with Samsung Kies

Samsung Kies is a computer application that manages media libraries, contacts, and calendars, and syncs them with Samsung devices. Download the latest Samsung Kies from the Samsung website.

1. Connect the device to the computer using the USB cable. Samsung Kies launches on the computer automatically. If Samsung Kies does not launch, double-click the Samsung Kies icon on the computer.

2. Transfer files between your device and the computer. Refer to the Samsung Kies help for more information.


Connecting with Windows Media Player

Ensure that Windows Media Player is installed on the computer.

1. Connect the device to the computer using the USB cable.
2. Open Windows Media Player and sync music files.

Connecting as a media device

1. Connect the device to the computer using the USB cable.
2. Open the notifications panel, and then tap Connected as a media deviceMedia device (MTP). Tap Camera (PTP) if your computer does not support Media Transfer Protocol (MTP) or not have any appropriate driver installed.
3 Transfer files between your device and the computer.


Securing the device

Prevent others from using or accessing personal data and information stored in the device by using the security features. The device requires an unlock code whenever unlocking it.

Setting a face unlock

On the Applications screen, tap Settings My deviceLock screen Screen lock Face unlock.

Fit your face in the frame to be captured. Then, set a backup unlock PIN or pattern to unlock the screen in case the face unlock fails.

Setting a face and voice unlock

On the Applications screen, tap Settings My device Lock screen Screen lock Face and voice.

Fit your face in the frame to be captured and then set a voice command. Then, set a backup unlock PIN or pattern to unlock the screen in case the face and voice unlock fails.

Setting a pattern

On the Applications screen, tap Settings My device Lock screenScreen lockPattern.

Draw a pattern by connecting four dots or more, and then draw the pattern again to verify it. Set a backup unlock PIN to unlock the screen when you forget the pattern.

Setting a PIN

On the Applications screen, tap Settings My device → Lock screen → Screen lock → PIN.

Enter at least four numbers, and then enter the password again to verify it.

Setting a password

On the Applications screen, tap Settings → My device → Lock screen → Screen lock → Password.

Enter at least four characters including numbers and symbols, and then enter the password again to verify it.

Unlocking the device

Turn on the screen by pressing the Power button or the Home button, and enter the unlock code.


New Cool Features of Samsung Galaxy S5


HDR (Rich tone)

For brighter & vivid captures. For both photos and videos, turn on the HDR when there is a strong counterlight or when the subject is shaded. Preview in real time natural light and color being reproduced vividly and clearly while you take your shot.

On the Apps screen, tap Camera →  , and then take a photo.


Selective Focus

Treasure moments in detailed focus. Selective Focus allows you to focus on what’s important by blurring the background and accentuating the main subject in defined detail.

Before using this mode

• It is recommended that you position subjects between 10-50 cm from the device. Place subjects that you want to focus on close to the device.
• When taking photos, ensure there is sufficient distance between the subject and the background. The distance should be more than twice the distance between the device and the subject.
• The quality of photos taken by the device may be affected in the following situations:
– Photos of subjects that are moving.
– Photos that are taken when the device is moving.
– Indoor photos, low-light conditions, or if there is strong light behind a subject.
– Photos using a background that cannot be distinguished from the subject, such as shadows or plain-coloured walls.

1. Tap Camera on the Apps screen.
2. Tap  at the left side of the screen.
   If  does not appear, tap  → Selective focus to activate it.
3. Tap the image on the preview screen where the camera should focus.
   When the subject is in focus, the focus frame turns green.
4. Tap  to take a photo.
5. Tap the preview thumbnail at the bottom right of the screen to edit the photo.
6. Tap  and select one of the following:
   • Near focus: Make the subject stand out and blur the background around the subject.
   • Far focus: Blur the subject and make the background stand out around the subject.
   • Pan focus: Make the subject and its background stand out.
7. Tap Done.


Heart Rate Sensor

Following your every beat. Galaxy S5 is the first smart phone with a built-in Heart Rate
Sensor which enables you to measure your heart rate directly on your phone.

Place your finger on the back of the Galaxy S5 and measure your heart rate.

Image Credit: Samsung


S Health

Your personal fitness tracker.

The enhanced S Health leads you through your fitness routines daily and consistently. Set your goals and achieve them with the help of Galaxy S5s pedometer and S Health’s constant tracking of your condition, walking distance, calories, speed, duration, and so on.

Galaxy S5 connects with the new Samsung Gear Fit and Gear 2 to give you freedom to do more.

Using the Exercise Mate

Set exercise goals to plan your exercise. Check and manage your exercise quantities and burnt calories based on your exercise schedule. You can view your exercise information and burnt calories in a graph and share the data with others.

NOTE: 

• Before using this feature, pregnant women, the elderly, and young children, users suffering from conditions, such as chronic heart disease or high blood pressure, are recommended to seek the advice of a licensed medical professional.

• If you feel dizzy, experience pain, or have difficulty breathing during exercise, stop using this feature and seek the advice of a licensed medical professional.

1. Tap  → Exercise.

2. Set the exercise type, activate or deactivate the voice guide, select background music, and then tap Start.
    The device records the exercise time and displays progress towards achieving exercise goals.

NOTE: If you wear the heart rate measurement device while performing aerobic exercise, such as running, the coaching feature recommends an appropriate exercise intensity. The recommendations, such as speed up or keep up this pace, are based on changes to your heart rate that the device detects. Also, the feature uses information about your physical condition and the effect exercise has on your body when making recommendations.
3. Start exercising and use the various features on the screen. Tap  to lock the screen and display exercise information only. To unlock the screen, tap and hold .

4. To finish using the Exercise mate, tap Pause → Stop. The exercise information, distance, and photos you have taken are displayed on the screen.

5. Enter additional information and tap Done. The device records the exercise information.

Tap  and use the following functions:

• Daily calorie goals: Change the amount of calories you plan to burn each day.
• Reset daily data: Reset the daily exercise data.
• Settings: Configure settings for S Health.
• Help: Access help information about using S Health.


Dust & Water Resistant

Made to last longer and stronger. With an IP67 certification, Galaxy S5 is resistant to sweat, rain, liquids, sand and dust, so your phone is protected for any activity and situation.

Finger Scanner

Fingerprint security & access. Security has been upgraded and personalized. You can now unlock your phone and make faster and more secure payments via PayPal with the swipe of your finger. When purchasing content with Samsung services, you can use your fingerprint instead of entering your Samsung
account password.

Registering fingerprints

1. On the Apps screen, tap Settings → Finger Scanner → Fingerprint manager.

2. If you are registering more fingerprints, a fingerprint recognition pop-up window appears. Scan a registered fingerprint on the device and tap + icon.

3. Place your finger on the fingerprint area at the bottom centre of the screen.

4. Tap and hold the screen in the fingerprint area, and then drag your finger downwards over the Home button.

Repeat this action using the same finger until the fingerprint is registered.If you bend your finger or use a fingertip, the device may not recognize your fingerprints.

5 If a pop-up window appears requesting a password, enter the alternative password, tap Continue, enter the alternative password again to verify it, and then tap OK. You can use the alternative password instead of scanning your fingerprints.

6 If a fingerprint lock pop-up window appears, tap OK → Fingerprint. You can use your fingerprints to unlock the screen.

Managing registered fingerprints

You can delete or rename your registered fingerprints.

On the Apps screen, tap Settings → Finger Scanner → Fingerprint manager.
To delete fingerprints, tap  → Deregister, select fingerprints, and then tap Trash Bin icon → OK.
To rename a fingerprint, tap  → Select, select a fingerprint, tap Pencil icon, and then enter a new name, and then tap OK.


Changing the alternative password

You can change the password that you use as an alternative to scanning your fingerprints.

1. On the Apps screen, tap Settings → Finger Scanner → Change alternative password.

2. Enter the current alternative password and tap Continue.

3. Enter a new password and tap Continue.

4. Enter the password again and tap OK.


Unlocking the screen with fingerprints

You can unlock the screen with the registered fingerprints.

On the Apps screen, tap Settings → Finger Scanner → Screen lock → Fingerprint.

Alternatively, on the Apps screen, tap Settings → Lock screen → Screen lock → Fingerprint.


Read More..

Friday, August 29, 2014

Samsung Galaxy S3 Short Solution

Samsung Galaxy S3 Short Solution ,Samsung Galaxy S3 Short battery damage Solution ,Samsung Galaxy S3 Short quick battery charge disscharge Solution ,Samsung Galaxy S3 Short battery down Solution ,Samsung Galaxy S3 Short set dead Solution ,Samsung Galaxy S3 Short set not open Solution .
Read More..

How To Install Android 4 3 Jelly Bean on Samsung Galaxy S3 GT I9300

Samsung Galaxy S3 released almost half a year and still Samsung launches Android firmwares update for the Samsung Galaxy S3. Android 4.3 jelly bean for the Samsung Galaxy S3 was launched via OTA you will immediately receive a notification of the OTA to update the firmware but if you do not want to wait for the OTA update to accept you can manually update the Samsung Galaxy S3 on Android 4.3 jelly bean. At this time we will guide you how to install Android 4.3 jelly bean on your Samsung Galaxy S3. In todays tutorial we will be using ODIN if you do not know how to use ODIN first read about how to use Odin then continue with this tutorial. Before we start make sure that the battery of your Samsung Galaxy S3 is charged more than 80% and you have a copy of all records of calls and messages and contacts. Because this method will erase all data on your smartphone.
Note : ”We shall not held responsible if you brick your smartphone using this tutorial or any other damage caused to your smartphone , please follow each step don’t skip any step “.
Important Things :
Enable USB Debugging Mode Battery level must be 80% or more This guide is for Sprint Galaxy S3 only EFS
Download Links:
Unbranded Firmwares, can be installed on an Unlocked Galaxy S3.

Download ODIN
  • ODIN v3.07, v3.06, v3.04, v1.85, v1.83 Download From Here
  • ODIN MUTLI DOWNLOADER ALL 4.XX VERSIONS Download From Here
  • SAMSUNG USB DRIVERS 1.5.20.0 NEEDED FOR ODIN Download From Here
  • ADB & FASTBOOT TOOLS Download From Here
Download USB drivers For Samsung Galaxy S3
samsung-galaxy-s3-hands-on-15

How To Install Android 4.3 Jelly Bean on Samsung Galaxy S3 GT-I9300.??
  1. Download any of the above firmware and extract files to your PC .
  2. Turn Off your Samsung Galaxy S3 and turn on in download mode by holding Volume down+Home and Power button , when smartphone starts use volume up to continue .
  3. Open ODIN and connect your device while its in download mode.
  4. When your smartphone connects with ODIN the ODIN port will turn yellow with COM port number .
  5. Now click PDA and select the file with .tar extension.
  6. In Odin check Auto Reboot and F.Reset options .
  7. Click Start and wait for the process to complete.
  8. When the process is completed wait for your smartphone to turn on and when home screen appears unplug your smartphone .
  9. Now you have Android 4.3 jelly bean installed on your smartphone enjoy.
Read More..

Saturday, August 23, 2014

How To Guide Install XXUEMKA Android 4 3 JB Firmware on Galaxy Note 2 N7100

Samsung launches Android 4.3 Jelly Bean XXUEMKA official firmware update for the Galaxy Note GT - N7100 2 . The firmware update is launched in various countries including Pakistan , Morocco , United Arab Emirates , Nigeria , Taiwan , Tunisia , Iraq , Afghanistan , Libya and South Africa , and also can be downloaded for manual updates . You can also update your device firmware via Kies or OTA update . Because of this smart phone is equipped with Android 4.1.2 Jelly Bean out of the box , this new firmware update will improve your smartphone to a better OS is Android 4.3 Jelly Bean . Continue reading this guide to find out how to get an official stock Android 4.3 Jelly Bean N7100XXUEMKA firmware running on Galaxy Note GT - N7100 2 . Almost all the possible ways to update your device firmware to this discussion here . One thing should be noted that the official firmware flashing or install kernel then restore root access you will fail , in short it will unroot it .

Android 4.3 Jelly Bean N7100XXUEMKA stock firmware available in both OTA and Kies update. However, if you can not get it from there then you can always blink N7100XXUEMKA Android 4.3 Jelly Bean firmware on Galaxy Note GT-N7100 manual 2. We will discuss all the ways available updates. You should always try OTA or Kies method first and when the second method does not work then just try flashing manually.

Warning: This tutorial is only for Galaxy Note 2 GT-N7100. Don’t try this guide on any other Android device. Also, we are not responsible for any damage caused due to the instruction given in this page. Try this at your own risk. However, it is very unlikely that your device will be damaged if you follow all the instructions as it is which are mentioned in procedure.

Pre Requisites:

Though official firmware restore all existing data but we recommend to back up your data first before proceeding to avoid any uncomfortable situation such as bootloop fix.

1. Backup your device data.

2. Make sure your device have at least 60% battery power. You can install an app like Battery Notifier BT Free on your Android device to check it easily.

3. You already have USB Driver Installed for Galaxy Note 2 GT-N7100 in your PC.Download USB Drivers

4. Make sure USB Debugging is enabled otherwise you won’t able to transfer file between PC and Galaxy Note 2 GT-N7100.

  • How To Update Galaxy Note 2 GT-N7100 via OTA
  • First of all make sure you have stable internet connection (Wi-Fi or data network) on your device.
  • Now, go to Android app drawer and then select Settings.
  • Then locate About Device and tap on it.
  • Next select Software update from About device screen.
  • Then tap on Update option.
  • You should see an update, press OK to download and install. (Remember, download using 3G or network data will incur additional charges to your phone bill!)
  • Soon your device will reboot to complete the installation process.

If you see “The latest update have already been installed” massage while checking update then your device yet to receive an OTA update. Check back within few days or jump to next procedure.
How To Update Galaxy Note 2 GT-N7100 via Kies

  1. Make sure you have stable internet connection on your computer.
  2. Now download and install Samsung Kies on your computer.
  3. Turn on your device (if it off) and then connect it to computer with USB cable.
  4. Run Samsung Kies and wait for it to detect your device.
  5. You should see a New Firmware Upgrade is available at Samsung Kies home screen.
  6. Press the Firmware Upgrade button to proceed.
  7. Follow on screen instruction and soon you will see your device running upgrade and reboot automatically. Once done, you can disconnect your device from computer.


Again! If you see “This is the latest firmware” in Samsung Kies, then your device yet to receive the latest update on Kies. Its good time to go for manual update instruction that located below.


[Note: You can install any firmware listed below despite availability in other countries, except those which comes with carrier name.]
N7100XXUEMKA Android 4.3 Jelly Bean Firmware Downloads


United Arab Emirates: N7100XXUEMKA_N7100OJVEMK3_LYS.zip


[Please Note: After flashing this firmware you will lost any installed custom ROM including CM10.2, AOKP, Avatar,Beanstalk, Omni ROM, Slim ROM, Pac-Man, Paranoid Android, LiquidSmooth or Carbon.

How To Install N7100XXUEMKA Android 4.3 Jelly Bean On Galaxy Note 2 GT-N7100 Manually

  1. Download Odin v3.09.
  2. Extract Firmware zip file that you downloaded earlier from above link, you will get a .tar.md5 file and some other files (optional).
  3. Extract Odin zip file and you will get Odin3 v3.09.exe along with few other files.
  4. Power off your Android device. Wait 5-6 seconds for vibration to confirm complete switch off.
  5. Now, put the Galaxy Note 2 GT-N7100 in Download Mode by pressing and holding down the Home &Volume Down button together while pressing the Power button. A warning screen will come up; press Volume Up button to enter Download Mode.
  6. Now run Odin3 v3.09.exe (see Step 3) as an Administrator because Admin privileges is required to complete the process smoothly (only applicable Windows Vista and higher).
  7. Now connect your device to your PC using USB cable. An “Added!!” massage will appear in Odin’s message box. If you don’t get the same then you should try another USB port (try USB port located in back in your desktop PC). If that too don’t work then you should reinstall the driver. If you successfully see the “Added!!” message in Odin then you are ready to go in next step. You should also see COM port with a number in Yellow if you successfully added your device.
  8. Click the AP Button, and select that .tar.md5 file that you get in Step 2.
  9. In Odin window, make sure only Auto Reboot and F. Reset Time checkboxes are selected.
  10. Double check everything that we mentioned in Step 8 & Step 9 above. Now, once satisfied hit the START button to begin the flashing process.
  11. Once flashing completed, your Galaxy Note 2 GT-N7100 will restart and soon you will see a PASS message with green background in the left-most box at the very top of the Odin. You can now unplug the USB cable to disconnect your device from computer.


Congrats! You just updated your Galaxy Note 2 GT-N7100 to Android 4.3 Jelly Bean firmware. Go to Settings > About device to verify this firmware update.
Fix Boot Loop Issue On Galaxy Note 2 GT-N7100

If Galaxy Note 2 GT-N7100 stuck at booting animation for more than 10 minutes after Step 11 then follow below instructions:
Go to recovery mode. To do so, press and hold the Volume Up, Home and Power buttons together.
Now perform Wipe data/Factory Reset and Wipe Cache Partition task before selecting reboot system now function. In recovery mode use Volume keys to navigate between options and Power key to select the option.
Please note, performing wiping task will erase your device internal memory data and not external SD card data.

That’s it! Let us know about your latest Android 4.3 Jelly Bean experience.
Read More..